Weird Things Nerds Do

Creative use of ADBInstall an app onto one device (B) from another device (A) using your computer.

  • Rooted Android Devices:
    • Enable ADB over wifi.
  • Windows PC:
    • Go to Android SDK folder
    • Connect to device A (adb connect [ip address]:[port]).
    • Access the shell and “su” to root (adb -s [ip address]:[port] shell).
  • Device A (still using Windows’ command prompt):
    • Connect to device B (adb connect [ip address]:[port]).
    • Install app to device B (adb -s [ip address]:[port] install /data/app/[app’s file name]).
  • Device B:
    • Check applications for your newly installed app.
    • Enjoy running your newly installed app.
C:\android-sdk\platform-tools>adb connect 192.168.1.6:5555
connected to 192.168.1.7:5555
C:\android-sdk\platform-tools>adb -s 192.168.1.6:5555 shell
shell@android:/ $ su
su
root@android:/ # adb connect 192.168.1.7:5555
connected to 192.168.1.7:5555
root@android:/ # adb -s 192.168.1.7:5555 install /data/app/com.electricsheep.asi-1.apk
405 KB/s (478636 bytes in 1.151s)
        pkg: /data/local/tmp/com.electricsheep.asi-1.apk
Success
root@android:/ #

Disclaimer: I am not responsible for you doing things wrong and breaking your phone or losing your data.

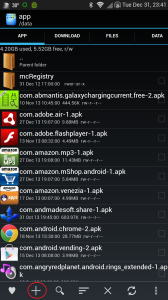
  1. Make a folder somewhere under /data1.

    Click the "+".

    Click the “+”.

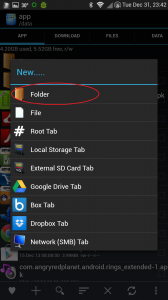
    Click "Folder".

    Click “Folder”.

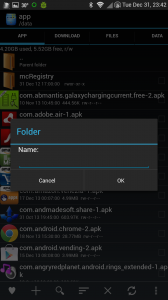
    Type a folder name and click "OK".

    Type a folder name and click “OK”.

  2. Move desired APK from /data/app or /system/app2 (only if you want to move a system app’s APK while preserving its “system app” status) to the folder you just made in step 1.

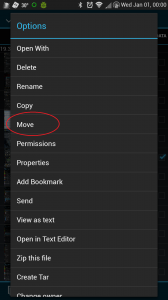
    Long click file and click "Move".

    Long click the file and click “Move”.

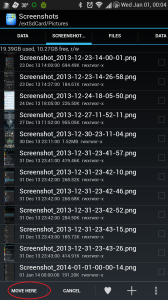
    Click "Move here".

    Click “Move here”.

  3. Make a symlink of the newly moved APK in /system/app.

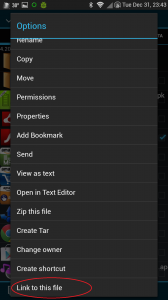
    Long click the file and click "Link to this file".

    Long click the file and click “Link to this file”.

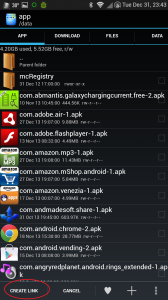
    Click "Create link".

    Click “Create link”.

  4. Repeat from step 1 for each desired app3.
  5. Clear dalvik cache or just delete the dalvik cache file for the selected app(s).
  6. Reboot.
  7. The app is now a system app in the eyes of Android and is stored on the user data partition. Good for space saving in the system partition and future ROM updates or no-data restores4.
  • I used Root Explorer for the screenshots. You can use any file explorer you want as long as it can make symbolic links. You can even use the command line if you know what commands to use.
  • Clearing data will also delete the APK. If this was intended, don’t forget to delete the symlink from /system/app – not required as Android will just ignore invalid APKs and if left there, you won’t need to relink, should you do this again, as long as the file path(s) are the same as they were before.
  • You can make the APK read-only to mimic the system partition (440 – a-rwx,ug=r), but it’s probably not necessary.
  • You can use second-partition apps like Link2SD that premount a user-created second partition on the external SD card.
  • Zipalign will undermine your efforts if the APK needs to be zip aligned – it effectively copies the APK file somewhere and copies it back thus overwriting the symlink with the Zip aligned original APK.

  1. Don’t use the SD card because it’s not available until long after boot up.
  2. Do not move core system apps from /system/app. If you wipe data for whatever reason or the data partition fails to mount, you will lose a vital core app and cause a boot loop and I will not help you fix that.
  3. Some app crashing may occur. I wouldn’t recommend moving the APK of the file explorer you’re using to do this unless you’re using the command line.
  4. The app will not get deleted, but you’ll have to relink the APK after a no-data restore or ROM update.