Survey
Android
Variables
General
A variable is a named value which changes over time e.g. the level of the battery, the time of day.
When Tasker encounters a variable name in a text, it replaces the name with the current value of the relevant variable before carrying out the action.
The main purposes of variables are:
dynamic binding: doing something with an action with data which
is unknown when the task is created e.g. respond to an SMS; the sender is not known until the SMS is received.
allow flow control within and between tasks
record data for some future use e.g. passing data between tasks
Global vs. Local Variables
Variables which have an all-lower-case name (e.g. %fruit_bar) are local, meaning that their value is specific to the task or scene in which they are used.
Variables which have one or more capital letters in their name (e.g. %Car, %WIFI) are global, meaning that wherever they are accessed from the same value is returned.
Built-In Variables
The values of built-In variables are updated automatically by Tasker.
Local Built-In Variables
Action Error
%err
Is set to an integer if an error occurred when running the last action. The actual number can signify the error which occurred, but is usually 1 for most Tasker actions (notable exception: Run Shell and plugins). Every action sets or clears it, so it must be saved (e.g. with Variable Set) if it will be needed later than in the immediate next action.
Action Error Description
%errmsg
A description of the error which last resulted in %err being set. Currently never set by Tasker but possibly by some plugin actions.
Task Priority
%priority
The priority of the running task. The priority determines which task executes its next action when several tasks are running together.
See also: Task Scheduling
Task Queue Time
%qtime
How long (seconds) the running task has been running.
Note that tasks can be interrupted by higher priority tasks, so this number is not necessarily the total run-time of the task.
Task Caller
%caller
A variable array tracing the origin of the current running task. %caller1 gives the origin of the current task, %caller2 the origin of %caller1 etc.
Example: if task A uses action Perform Task to start task B, then when task A is run by pressing the Play button in the task edit screen, %caller1 in task B will show task=A, %caller2 will show ui.
The format of each entry in the array is callertype(=callername(:subcallername))
Caller types ares detailed below:
profile
a profile (when it’s state changes). callername is either enter or exit depending on whether the profile activated or deactivated. subcallername is the name of the profile, if it has one, otherwise anon
scene
a scene event, with callername being the scene name. For element events, subcallername is the element name. For action bar button presses, subcallername is the label if one was given. For scene-global events (e.g. Key), subcallername is event type
ui
the Play button in the task edit screen in the Tasker UI
launch
clicking a child application icon in the launcher
nbutton
a notification action button, either from Tasker’s permanent notification or one created with one of the Notify actions. callername specifies the label of the button if present.
external
an external application
qstile
a Quick Settings tile. callername specifies the label of the tile.
appshort
an app shortcut (accessed via long-click on the Tasker icon). callername specifies the label of the tile.
task
another task, from a Perform Task action. subcallername is the task name, if it has one, otherwise anon
powermenu
the power menu on Android 11+.
Global Built-In Variables
Airplane Mode Status(dynamic)
%AIR
Whether Airplane Mode is on or off
Airplane Radios
%AIRR
A comma-separated list of the radios which will be disabled when entering Airplane Mode.
Common radio names are: bluetooth, cell, nfc, wifi, wimax.
Battery Level
%BATT
Current device battery level from 0-100.
Bluetooth Status (dynamic)
%BLUE
Whether Bluetooth is on or in some other state (off).
Calendar List
%CALS
Newline-separated list of calendars available on the device.
Each entry is in the format calendarprovider:calendarname.
Example usage: Variable Set, %newline, \n Variable Split, %CALS, %newline Flash, %CALS(#) calendars, first one is %CALS(1)For the sign \n, press carriage-return on the keyboard.
Calendar Event Title / Descr / Location %CALTITLE / %CALDESCR / %CALLOC
The title, description and location of the current calendar event, if there is one. If there are multiple current calendar events the variables refer to the shortest.
Tip: find other details about the current event(s) using the Misc / Test action, specifying %TIMES for the data.
Call Name / Number/ Date / Time (In) (dynamic, monitored)
%CNAME / %CNUM / %CDATE / %CTIME
The caller name, number, date and time of the current (if a call is in progress) or last call received.
Caller number is 0 if it’s unknown.
Caller name is ? if it’s unknown (probably because the caller number was blocked) and set to the caller number if the contact couldn’t be looked up. It’s unavailable on Android versions prior to 2.0.
Call Name / Number/ Date / Time / Duration (Out)(dynamic, monitored)
%CONAME / %CONUM / %CODATE / %COTIME / %CODUR
The called name, number, date and time of the last (not the current) outgoing call made.
Called Name is set to the called number if the contact couldn’t be looked up. It’s unavailable on Android versions prior to 2.0.
Cell ID (monitored,dynamic)
%CELLID
The current cell tower ID if known.
If you are using a Cell Near state, note that sometimes the Cell Near state will stay active even though %CELLID reports that the tower ID is unknown or invalid; that is because Cell Near only responds to valid IDs to prevent the state becoming inactive e.g. due to a service interruption.
For backwards compatibility, UMTS cells are reported with a GSM prefix.
From Android 4.2, Tasker version 4.3+, cells could be found from 2 different network types simultaneously. In that case, the value is reported with preference for the network type leftmost on the list: GSM, CDMA, UMTS, LTE.
Cell Signal Strength (monitored,dynamic)
%CELLSIG
The current phone signal level from 0-8 inclusive on a rougly linear scale. On some phones, the level will rise in steps of 2 (0,2,4,6,8). The value is -1 if the value is unknown or there is e.g. no service.
From Android 4.2, Tasker version 4.3+, cells could be found from 2 different network types simultaneously. In that case, the value is reported with preference for the network type leftmost on the list: GSM, CDMA, UMTS, LTE.
There is a bug with some Android versions that the reported signal strength is not updated until the device is turned off and on.
Cell Service State (monitored,dynamic)
%CELLSRV
The current phone service state. One of unknown, service, noservice, emergency, nopower.
Clipboard Contents(monitored,dynamic) %CLIP
The current contents of the system clipboard. Please note that the clipboard can’t be accessed while the device’s screen is securely locked.
CPU Frequency
%CPUFREQ
The current frequency CPU 0 is running at. See also: CPU Control.
CPU Governor
%CPUGOV
The current governor controlling the frequency of CPU 0. See also: CPU Control.
Date
%DATE
Current human-readable date.
Day of the Month
%DAYM
Current Day of the Month, starting at 1.
Day of the Week
%DAYW
Current Day of the Week starting with Sunday.
Device ID / Manufacturer / Model / Product
%DEVID / %DEVMAN / %DEVMOD / %DEVPROD
The ID, manufacturer, model and product name of the device.
Note: ID is not a unique identifier for the device, but rather for the hardware of the device. See also: %DEVTID.
Device Telephony ID
%DEVTID
Returns the unique telephony-based ID for the device (e.g. for GSM the IMEI, for CDMA the MEID or ESN).
Not available on all devices.
Display Brightness %BRIGHT
Current screen brightness, 0-255. On some devices, if the Android setting Auto Brightness is enabled, the value will always be 255.
Display Timeout %DTOUT
Current system screen timeout (seconds).
Email From / Cc / Subject / Date / Time (dynamic)
%EFROM / %ECC / %ESUBJ / %EDATE / %ETIME
The From, Cc, Subject, Received Date and Received Time of the last email received by the K9 email agent.
Free Memory
%MEMF
System free memory remaining in MB.
GPS Status
(monitored,dynamic Gingerbread+) %GPS
Whether the system GPS receiver is on or off.
Heart Rate (monitored,dynamic)
%HEART
The current detected heart rate in beats per minute.
See also: state Heart Rate.
The value will be negative for no contact (-1), accuracy unreliable (-2) or some other problem (-3)
HTTP Response Code / Data / Content Length(dynamic) %HTTPR / %HTTPD / %HTTPL
Values from the last HTTP POST/GET action.
If the server doesn’t return a content length, %HTTPL will be calculated from the returned data where possible.
Humidity (monitored,dynamic)
%HUMIDITY
The relative ambient air humidity in percent.
See also: state Humidity.
Input Method
%IMETHOD
The current active input method. Consists of 4 parts separated by commas: Method Name, SubType Name, Mode, Locale.
To access particular parts, use the Variable Split action.
Interrupt Mode (dynamic)
%INTERRUPT
Only available on Android 5.0+, requires Tasker’s notification access service to be enabled, see Android’s Sound & Notification settings.
Android 5.0+: the current state of interruptions mode on the device: none, priority or all
See Also: action Interrupt Mode
Android 6.0+: the current state of Do Not Disturb mode on the device: none, priority, all or alarms
See Also: action Do Not Disturb
Keyguard Status
%KEYG
Whether the Keyguard is on or off
Last Application
%LAPP
The name of the application that was in the foreground before the current one e.g. Maps.
Last Photo
%FOTO
The filesystem path to the last photo taken by Tasker or the standard system camera application.
Light Level (monitored,dynamic)
%LIGHT
The last recorded light level in lux.
Note that Android does not return a value until the light level changes, so to test the sensor is working you should put it near a bright light initially.
May not change when the device display is off, see Menu / Prefs / More / Display Off Monitoring / Light Sensor.
Location (dynamic)
%LOC
The latitude and longitude of the last GPS fix.
See note.
Location Accuracy (dynamic)
%LOCACC
The accuracy in metres of the last GPS fix.
See note.
Location Altitude (dynamic)
%LOCALT
The altitude in metres of the last GPS fix, or 0 if unavailable.
See note.
Location Speed (dynamic)
%LOCSPD
The speed in metres/second at the last GPS position fix or 0 if unavailable.
See note.
Location Fix Time Seconds (dynamic)
%LOCTMS
The time in seconds of the last GPS fix. To get age of fix, take this away from %TIMES.
This value is not set until an offset of the GPS time from the fixed time has been calculated (should be after the first GPS fix) because the value is meaningless until that point.
See note.
Location (Net) (dynamic)
%LOCN
The latitude and longitude of the last network location fix.
See note.
Location Accuracy (Net) (dynamic)
%LOCNACC
The accuracy in metres of the last network location fix.
See note.
Location Fix Time (Net) (dynamic)
%LOCNTMS
The time in seconds of the last net location fix. To get age of fix, take this away from %TIMES.
See note.
Magnetic Field Strength (monitored,dynamic)
%MFIELD
The total magnitudes in micro-Teslas of the magnetic fields acting on all three axis of the devices sensor.
Updated once per second.
See Also: state Magnetic Field.
Music Track (monitored,dynamic)
%MTRACK
The current playing music track, supported for:
Tasker actions Music Play and Music Play Dir
Built-in Android music-player, probably not on all devices however
Power AMP
BeyondPod (Tasker v1.2.1+)
Phantom Music Control Pro
Media Utilities
Priority: if both Tasker and one of the other supported apps are playing simultaneously, the non-Tasker track will be shown. If more than one of the other supported apps is playing simultaneuosly, behaviour is unspecified.
Notes:
if you don’t have a supported player, you could try Phantom Music Control Pro or Media Utilities, which support a lot of players and should pass the info on to Tasker
pausing a track clears the variable, unpausing sets it again
your music player may need an option enabled in order to broadcast the track information, or the broadcast may only be available in a ‘pro’ version
Muted
%MUTED
Whether the microphone is currently muted (on) or not (off).
Night Mode
%NIGHT
The current Android Night Mode.
One of on, off or auto.
If auto, Android will decide whether it should be in Night Mode itself.
Notification Title (monitored, dynamic)
%NTITLE
The title of the last notification shown in the status bar. Prior to KitKat, requires Tasker’s accessibility server to be running (see Android Accessibility Settings). From KitKat, requires Tasker’s Notification Listener service to be running instead.
In a task running as a result of a Notification or Notification Removed event, use variable %evtprm2 instead of %NTITLE. This is much more reliable and you have access to other parts of the notification (%evtprm3 etc)
Notifications generated by Tasker are not shown.
Phone Number
%PNUM
The current phone number of the device, if it’s in service.
On some phones it doesn’t work (Android limitation), seems related to the type of SIM.
Pressure (monitored,dynamic)
%PRESSURE
The current air pressure on the device in millibars.
May not change when the device display is off, see Menu / Prefs / Monitor / Display Off Monitoring / Pressure Sensor.
Profiles Active (dynamic)
%PACTIVE
A comma-separated list of the currently active, named profiles in activation order. Duplicate names will appear on the list only once. The list always starts and ends with a comma to make matching easier, if it’s not empty.
Profiles Enabled (dynamic)
%PENABLED
A comma-separated list of the currently enabled, named profiles in creation order. Duplicate names will appear on the list only once. The list always starts and ends with a comma to make matching easier, if it’s not empty.
Roaming
%ROAM
on if device is roaming on the current telephone network, otherwise off.
Root Available
%ROOT
yes if root functions are available on this device, otherwise no.
Screen (dynamic)
%SCREEN
Whether the screen is on (value on) or off (value off).
SDK Version
%SDK
The numeric Android SDK version of the device.
Silent Mode (dynamic)
%SILENT
The current state of silent mode: off, vibrate or on.
From Android 5.0+ this variable is intended to only reflect whether the device is in vibrate mode (vibrate) or not (any other value), but the on value is included for backwards compatibility and set when the device is not in vibrate mode and the interrupt mode is none or priority.
See Also: variable all, actions Silent Mode and Interrupt Mode.
SIM Serial Number
%SIMNUM
The serial number of the SIM card, if one is present and accessible.
If the SIM has not been unlocked it will not be available.
SIM State
%SIMSTATE
The current state of the SIM card.
One of unknown, absent, pinrequired, pukrequired, netlocked or ready.
Speakerphone
%SPHONE
Whether the speakerphone is on or off
Speech (dynamic)
%SPEECH
The current utterance as a result of a Say or Say File action, if applicable.
Tasks Running (dynamic)
%TRUN
A comma-separated list of any named tasks which are currently running. The list always starts and ends with a comma to make matching easier, if it’s not empty.
Telephone Network (dynamic, monitored)
%TNET
The current telephony network operator the device is using.
May be unreliable on CDMA networks
Temperature (monitored,dynamic)
%TEMP
The current ambient temperature in degrees Celsius.
May not change when the device display is off, see Menu / Prefs / Monitor / Display Off Monitoring / Temp. Sensor.
See also: state Temperature.
Text From/Date/Subject/Time (monitored)
%SMSRF / %SMSRN / %SMSRB / %MMSRS / %SMSRD / %SMSRT
The sender address, name, body, subject, date and time of the last text (SMS or MMS) received.
These variables will be empty until the first time a text is received after they have been referenced because Tasker does not monitor texts unless it’s needed.
Name is set to sender address of no contact could be looked up. It’s unavailable on Android versions prior to 2.0.
Body (%SMSRB) is only set for SMSs.
Subject (%MMSRS) is only set for MMSs.
Time
%TIME
Current human-readable time separated by a period e.g. 10.59
Tether (dynamic)
%TETHER
A comma-separated list of enabled tethering forms i.e. connections over which another device can connect to this one in order to use its internet connection.
The possible forms are wifi, usb or bt.
BT will only be present when an actual client is connected via BT for using the devices network connection, whereas the others will be present as soon as the functionality is enabled (Android bug/limitation).
Time MilliSeconds
%TIMEMS
The current time in milliseconds.
(milliseconds since some time in January, 1970, if you must know).
Time Seconds
%TIMES
The current time in seconds.
(seconds since some time in January, 1970, if you must know).
UI Mode (monitored,dynamic)
%UIMODE
The current Android UI mode.
One of car, desk, appliance, tv (television), watch, undef (undefined) or normal.
Uptime Seconds
%UPS
The number of seconds since the device last booted.
Volume – Alarm/Call/DTMF/Media/Notification/Ringer/System (dynamic)
%VOLA / %VOLC / %VOLD / %VOLM / %VOLN / %VOLR / %VOLS
Current audio channel volume level.
On some devices, volume changes are not picked up dynamically, on others not when using the phone app.
WiFi Info
%WIFII
When connected to an Access Point (AP), shows human-readable data about the AP. When not connected, show details of the most recent Wifi scan results for nearby APs.
On Android 8.1+, may require basic location services to be enabled in Android settings.
WiFi Status (dynamic)
%WIFI
Whether WiFi is on or off. Note: if WiFi is enabling or disabled, in fact anything but enabled, it’s classed as off.
Wimax Status
%WIMAX
Whether Wimax is on or off. Note: if Wimax is enabling or disabled, in fact anything but enabled, it’s classed as off.
Window Label (monitored,dynamic)
%WIN
The label of the current window, which could be a full-screen activity or a dialog.
Not set if the label is unknown.
For some windows, the label might be that of the first item in the window e.g. a menu entry or even a button.
General Notes
Variables marked dynamic in the list above trigger changes in Variable Value states and Variable Set events whenever their value changes.
Variables marked monitored will cause the relevant monitor to startup to track their state when they are used in contexts or tasks which are used by widgets or enabled profiles. For instance, GSM:39179.115461560 used in a Flash action will cause cell location to be tracked.
Limitation: monitored variables cannot be detected in anonymous shortcuts.
Note On Location Variables
When the relevant provider (Net or GPS) of a location context is active, these variables report the values from the provider, which may be more recent than Tasker has seen if other applications are asking for location.
When the relevant provider is not active, these variables report the last values seen by Tasker, which could be the result of a Get Location action or of monitoring for a Location Context.
That means the the reported fix times could go backwards, if you turn off the location provider between two uses of the variables.
Location variables can also be manually updated by running the Get Location action.
User Variables
The action Variable Set (and several others) can be used to create new variables. Variable names have the following restrictions:
they must start with the % character
they are case-sensitive
then must at least a further 3 alphanumeric characters
they can also contain the underscore character (_) but not start or end with it
In general, it’s best to use local variables wherever possible because:
you know they won’t be interfered with by other tasks or scenes
they are more efficient in several ways
Note: multiple copies of the same task running at the same time each have their own separate copy of their local variables.
Scene-Local Variables
Each scene has its own set of local variables which it shares with the task that created it; both the scene and task see changes to the variables made by either.
Any task which starts as a result of a scene event (e.g. a tap on an element) also shares the variables of the scene (and thus of the original task which created the scene).
As a consequence, a task started by a scene event (e.g. Tap on an element) which shows a new scene e.g. via the Show Scene action, will result in the second scene sharing the variables of the first scene.
When a task shows a scene that was created by a different task (or a different copy of the same task) and subsequently hidden, the task’s variables are copied to the scene variables (overriding values of variables which already exist) but the task does not share the scene variables and cannot see changes to them.
Escaping Variable Names
If you want to prevent a variable name being replaced, put a \ in front of it e.g.
Variable Set, %new, \%old
Will set the value of %new to %old, not the value of %old.
In order to precede a variable name with a \ you can escape the backslash e.g.
Variable Set, %new, \%old
Will set the value of %new to \ followed by the value of %old.
Variable References
It’s possible to indirectly refer to variables by preceeding one or more extra % signs to the start of the variable name. For example:
Variable Set, %colour, red
Variable Set, %varname, colour
Flash %%varname
… will flash red.
Using this notation it’s possible to assign variables whose name is not known beforehand:
Read File, variablename.txt, To Var, %varname
Variable Set, %%varname, red
This will set the variable whose name is stored in the file variablename.txt to red.
You can nest references as deeply as you like (e.g. %%%%var) but mental stress and bugs are sure to follow.
If any part of the chain has an invalid variable name then the original reference will be returned. In the first example, if %varname is set to !!!, then %%varname will be flashed instead of red.
Variable Lifetime
The value a global variable holds lasts until Tasker is uninstalled if it is not changed by any task.
Local variables are lost at the end of the task they were created in, or when the parent scene is destroyed in the case of tasks called from scenes.
Uninitialized Variables
User-variables which have not had a value assigned do not have replacements carried out e.g. in the expression I love %fruit, if %fruit is uninitialized, the expression remains as it is, otherwise %fruit is replaced with the value.
Exception: uninitialized variables used in mathematical expressions are replaced with 0.
Variables In Plugins
Plugin developers can tell Tasker to replace variables it finds in plugin strings with their current Tasker value. If you have a plugin which doesn’t support this, send the developer this URL
http://tasker.dinglisch.net/plugins.html
which has the relevant details.
Variable Arrays
Tasker supports pseudo-arrays.
They are especially useful when used with the For action, since you can perform a set of actions on each element in turn e.g. list a set of files then test each one.
Examples
If the four variables %arr1, %arr2, %arr3, %arr4 hold respectively alpha,beta,cat and dog then we have an array with 4 elements. These variables can be used just like any other, however it is also possible to access them in special ways. Here are some examples:
%arr(#)
The number of defined array elements (4 in this case)
%arr(#>)
The index of the first defined array element, or 0 if none are defined (1).
%arr(#<)
The index of the last defined array element, or 0 if none are defined (4)
%arr(#?beta/cat)
A comma-separated list of the array indices (lowest to highest) with matching values, or 0 if none match (2,3 in the example)
%arr(#?~Rregex here)
Same as above but with regex matching
%arr(>)
The contents of the first defined array element (alpha)
%arr(<)
The contents of the last defined array element (dog)
%arr() or %arr(:)
All of the array elements separated by commas (alpha,beta,cat,dog)
%arr(2) or just %arr2
The content of the element with index 2 (beta)
%arr(2:4)
Contents of defined elements with indices 2 to 4 (beta,cat,dog)
%arr(:3)
All the defined elements with indices up to 3 (alpha,beta,cat)
%arr(3:)
All the defined elements with indices starting from 3 (cat,dog)
%arr(1:2)
All the defined elements with indices from 1 to 2 (alpha,beta)
%arr(+=)
All of the array elements separated with a character other than a comma, as definited after the + sign. (alpha=beta=cat=dog)
%arr(+=+function)
Contents of defined elements in an array function separated by a character other than a comma, as defined between the + signs. Example %arr2>%arr3>%arr4 returns (beta>cat>dog)
%arr($?search)
All of the array element values that match the pattern specificed in search, Example: 0 will return all array values that contain dog anywhere in the value.
%arr($?~Rregex here)
Same as above but with regex matching
Notes:
arrays will virtually always have all their elements defined so e.g. %arr(>) will be the same as %arr(1), %arr(#) will be the same as %arr(#<)
index specifiers can themselves be variables (e.g. %arr(1:\%MAX) or %arr(#?\%FINDME)) but not variable arrays
Creating An Array
using Array Set:
Array Set, %arr, a b c d
using Variable Split on an existing (simple) variable:
Variable Set %arr a b c d
Variable Split %arr
by assigning individual elements with Variable Set:
Variable Set, %arr3, c.
using Array Push to add an initial element
some other actions also create arrays for their results e.g. List Files.
Inserting Elements
Use the Array Push action.
The Fill Spaces parameter might need more explanation. It is only relevant if one or more of the array elements are undefined. As an example, if we have the array elements %arr1 and %arr3 containing apple and banana:
Array Push %arr1, 1, pear
leaves %arr1, %arr2 and %arr4 containing pear, apple and banana.
but Array Push %arr2, 1, pear, Fill Spaces
leaves %arr1, %arr2 and %arr3 containing pear, apple and banana.
Removing Elements
Use the Array Pop action. Note the difference between Array Pop and Variable Clear: Pop reduces the number of elements in the array, while Clear merely changes elements to undefined.
Example: if we have the array elements %arr1, %arr2, %arr3 containing apple,pear and banana:
Variable Clear %arr2
leaves %arr1 and %arr3 containing apple and banana.
but Array Pop %arr2
leaves %arr1 and %arr2 containing apple and banana.
Deleting An Array
Use Array Clear.
In most cases you could also use Variable Clear %arr* with Pattern Matching checked, but that would also delete variables called e.g. %arrTOODEETOO so Array Clear is safer.
Sorting
The Array Process action offers various sorting options, amongst other things.
Array Efficiency
Arrays are intended for convenience when processing high-level data, not for e.g. processing astronomical data. Doing thousands of array actions will likely take several seconds (although mostly due to the housekeeping work done by Tasker in-between each action rather than due to the array operations themselves).
In terms of storage efficiency, they are also fairly hopeless. You probably do not want to store tens of thousands of items in an array.
Structured Variables
Starting in version 5.12 Tasker can read some types of structured text (like JSON or HTML) directly.
To be able to read these structures the Structured Output option in the action that created the variable (eg. Variable Set, HTTP Request, etc) has to be enabled. For ease of use, the option is enabled by default
It’s very, very unlikely that leaving this option enabled, even for variables that don’t contain structured text, will create any issues because if Tasker finds that the text doesn’t conform to any known structure it won’t try to read the structure anyway. This option is just a precaution to make sure that no existing setup would be broken by the update
Check below to find out how to read the supported structure types.
JSON Reading
Consider the following JSON stucture:
{ “names”:[ { “name”:”João”, “lastname”:”Dias” }, { “name”:”John”, “lastname”:”Days”, “age”: 99 } ] }
Starting in version 5.12 Tasker can read the values directly. You can either use the dot or square bracket notations as shown below (consider there’s a variable named %json with the above text).
%json.name or %json[name] or %json.names.name will return the first name which is João
%json.name() or %jsonname will return a comma separated list of names: João,John
Notes:
Using just the key (like name in the above example) will get the first value for that key, no matter how deep it is in the structure. If you want to get a value for a specific full path, use names.name as shown above. Note: If you use the Set Variable Structure Type action to set the type of the variable specificly to JSON you can prevent this smart search feature and have Tasker always interpret the key as a full path key.
If you use a single key (eg %json.name) when reading JSON, smart search is assumed, meaning it’ll look anywhere in the JSON structure for that key and return its value. If you use 2 or more keys (eg. %json.names.name or %json.some.very.deep.path) you always have to use the full path to the key you want to read. No special smart search will performed at all when using more than 1 key.
You can use the special =:=root=:= key to read the root element of a JSON structure. For example, to get a Tasker array from a JSON array stored in the %json_array variable you would use %json_array[=:=root=:=]()
Getting arrays will get all values with matching keys or paths. The full structure of the JSON obect is not taken into consideration. In the above example %json.age() would get just 99 for example.
You can’t use invalid local Tasker variable name characters if you use the dot notation. For example, if you need to read a JSON value with the key some thing (notice the space) you have to use the square bracket notation. The same applies for upper-case JSON fields. For example, you have to use %json[SomeField] to read the SomeField JSON value.
You can use any Tasker array features on these. For example, you can use %json.name(<) to get the last name of the above structure.
If you plan to use these in the List Dialog action as an input of the Items field use %json.name directly, and not %json.name(), since the latter will produce a comma separated list which will conflict with your data if it already contains commas.
HTML/XML Reading
Consider the following HTML stucture:
Test HTML For Tasker
Hello!
How are you?
I’m fine!

Starting in version 5.12 Tasker can read the values directly. You can either use the dot or square bracket notations as shown below (consider there’s a variable named %html with the above text).
%html.div or %html[div] will return the first div’s content which is How are you?
%html.div() or %html[div]() will return a comma separated list of div contents: How are you?,I’m fine!
%html[img=:=src] will return the first img’s src attribute image.jpg. You can use the =:= notation to retrieve any element’s attributes as shown.
Notes:
If you want to use an attribute matching CSS query like [attr=value] use curly braces instead of square brackets, eg {attr=value}. For example, to query a div where attribute sr=1 you should use something like %html[div{sr=1}].
If you want to use a CSS query that uses parenthesis like div:nth-child(2) use «» instead of parenthesis, eg div:nth-child«2»
HTML/XML reading doesn’t support nested reading in the same expression, so something like %html.query1.query2 will not work. Use a CSS query like query1>query2 instead to get inner fields.
You can try out your CSS queries here.
CSV Reading
Consider the following CSV stucture:
name,age,town Jack,41,London Lindsey,12,New York Eddie,54,Lisbon
Starting in version 5.12 Tasker can read the values directly. You can either use the dot or square bracket notations as shown below (consider there’s a variable named %csv with the above text).
%csv.name or %csv[name] or %csv.names.name will return the first name which is Jack
%csv.name() or %csvname will return a comma separated list of names: Jack,Lindsey,Eddit
Notes:
You can’t use invalid Tasker variable name characters if you use the dot notation. For example, if you need to read a CSV value with the key some thing (notice the space) you have to use the square bracket notation.
You can use any Tasker array features on these. For example, you can use %csv.name(<) to get the last name of the above structure.
If you plan to use these in the List Dialog action as an input of the Items field use %csv.name directly, and not %csv.name(), since the latter will produce a comma separated list which will conflict with your data if it already contains commas.
<Me>
I’d like two of my accounts merged.
<CS Mayank>
Thank you for contacting EA Help. My name is Mayank and I would assist you today with your concern
Please do not worry about it, we will try our best to help you with this issue.
kindly provide your username and email address so that we can locate the account
Also, if you have any further questions regarding this or any other issues, d please do not hesitate to let us know. You can also find answers to common questions on our Help Center at http://help.ea.com , or ask our community experts by visiting Answer HQ at http://answers.ea.com. Thanks again for contacting EA Help.
<Me>
The accounts I want to merge are redacted (redacted) (the new account) and redacted (redacted) (the old account). I want the stuff from redacted to be the account receiving the goods from redacted (ie redacted is the destination account). I don’t know how this merging thing works. If I have to blow up both of them, so be it.
<CS Viola>
Thank you for reaching out to EA help!
My name is Viola and I will be assisting you today.
I would like thank you for taking your time to share your concern with us.
I understand that you are having a concern regarding The Merging of the account.
Please be rest assured we will do our best to help you with your concern.
Just so you know, all EA account are lock due to security reasons and we need to verify them to proceed further.
Also thank you for confirming your email and EA ID we have successfully located your account and sent you a 6 digit verification code in your email please check your inbox and your spam folder.
Awaiting your response.
Should you need any further assistance you can contact us through our live chat channel https://www.help.ea.com and select the option as live chat.
Thank you for contacting EA Help!
Have a great day.
<Me>
The code you sent to redacted is redacted.
Did you also send one to redacted? If you did, I didn’t receive it.
<CS Manish>
Hi there,
Thank you for reaching out to EA help!
My name is Manish and I will be assisting you today.
I would like thank you for taking your time to share your concern with us.
I understand your concern.
ACCOUNT MERGER DISCLAIMER
n order to merge your EA Accounts, I’ll need to remove your games from the old EA Account so we can add them to the primary EA Account. When I do this, you will lose the progress, saved data, and stats from your games saved online on EA servers to your old EA Account. This includes:
any content you’ve saved to the cloud
any online and multiplayer data, such as Apex Legends stats or FIFA or EA SPORTS FC Ultimate Team content
any purchases you’ve made on the old EA Account we’re moving the games from, including in-game currency and anything you’ve bought using in-game currency
any EA games you’ve downloaded and purchased on Steam or Epic
any content, online and multiplayer data and purchases made in games accessed via an active EA Play subscription on the old EA Account
and potentially any offline saved data on your device.
I can only move full games (excluding FIFA, EA SPORTS FC, Apex Legends, SWTOR, Third-Party games and games downloaded from the Play List from any active EA Play subscription on the old EA Account), so any Alphas, Betas, or Demos will be lost, and not moved to your new primary EA Account.
[If they have The Sims 3 content on their account: If you play The Sims 3 and have purchased Worlds for your game, the Worlds and any game saves you have with Worlds will be inaccessible. That means you will not be able to play any of your game saves and would need to create new ones without Worlds to play your game.]
Once we merge your accounts into the primary EA Account and all of your content is in one place, all of your old accounts will be deactivated.
Now that you know what will happen when we combine accounts, do you understand these risks and agree to an account merger?
Awaiting response.
Should you need any further assistance you can reach out to us any time or you can also contact us through our live chat channel https://www.help.ea.com and select the option as live chat.
Thank you for contacting EA Help!
Have a great day.
<Me>
Yes.
<Me, again a full day later>
Just checking in. I said yes.
<CS Binod>
Thank you for contacting us back at EA. This is Binod following up on your case.
Thanks for the confirmation. I would request you to please read the below conditions and recommendations of merging accounts relevant to your accounts and confirm if you want to proceed.
We can only transfer all Origin/the EA app PC games that are in the account. We can’t transfer only one or a few games.
We do not transfer duplicate games in order to preserve their accounts and games integrity.
We can’t transfer EA Play Memberships / Third-Party Games.
We can’t transfer SWTOR because a player’s SWTOR account is connected to the EA Account. If we remove the SWTOR game from the original EA Account, game data will be lost, and the game will be unplayable.
We do not transfer Apex Legends or the latest version of EA SPORTS FC in order to preserve accounts and games integrity. We recommend that the EA Account which has SWTOR, Apex Legends, any Third-Party games, the latest released version of EA SPORTS FC and/or an active EA Play membership to be the primary. However, if the player decides otherwise, they will lose all this content.
We can unlink the same platform account ID per EA Account every 6 months. If the platform account ID has already been unlinked in the past 6 months, the player will lose access to it once the old EA Account is deactivated.
I’ll look forward to your reply and appreciate for your patience and understanding on this matter.
You can check the status of your case from My Cases on EA Help.
https://help.ea.com/help-my-cases/
If you need more information, check out these resources:
https://help.ea.com/help-home/
For game-specific help: Go to the EA Help home page, choose the game or product you need help with, and click See all help topics https://answers.ea.com/. Visit Answers HQ to get help from other players in the community.
Follow http://eahelp/ for everything from outage info to game news.
Subscribe to EA Help on https://www.youtube.com/channel/UC0GKI1WjINB2BqHsaodnOeQ
Thanks again for contacting EA help.
<Me>
Yes. I want to proceed.
<CS Nishita>
Hello
Thank you for reaching out to EA help!
My name is Nishita and I will be assisting you today.
I would like to thank you for taking your time to share your concern with us.
I understand that your concern is regarding Merging account. Please be rest assured we will do our best to help you with your concern.
Thank you for your response.
To share any information or make any changes to your account I would need to do the owner verification, for that, I have sent a verification email, please check. The email has the subject line “Verify ownership of your EA Account” and you may have received it in your inbox or spam inbox.
I have shared you 6 digit code on your email please share the same here.
I will look forward to your reply and appreciate for your patience and understanding on this matter.
Should you need any further assistance you can reach out to us any time or you can also contact us through our live chat channel https://www.help.ea.com and select the option as live chat.
Thank you for contacting EA Help. Have a great day!
<Me>
Verification code: redacted
We did this before.
<CS Raja>
Thanks for reaching out.
Thank you for providing the code.
I would like to inform you that we won’t be able to merge the account however, we can transfer your content to the new account.
Let me know if you would like to proceed.
We will be waiting for your response.
You can check the status of your case from My Cases on EA Help.
If you need more information, check out these resources:
For game-specific help: Go to the EA Help home page, choose the game or product you need help with, and click See all help topics.
Visit Answers HQ to get help from other players in the community.
Follow @EAHelp for everything from outage info to game news.
Subscribe to EA Help on Youtube for video walkthroughs and guides.
Thanks for contacting us and have a great day!
<Me>
I just want the contents of redacted (redacted) transferred to my current account: redacted (redacted).
<CS Himanshi>
Hello Player,
Thank you for contacting EA help. My name is Himanshi and I will assist you with your issue today.
I hope this email finds you in a great mood and health. Upon reviewing your case, I’ve gathered that you have contacted us regarding Merging accounts.. Please do not worry, I will surely try help you regarding your concern.
I am afraid but the code you have shared is expired. Please be informed that I have shared another 6-digit verification code on your registered email address.
In case you have any query, you can visit find answers to common questions on our Help Center at http://help.ea.com, or ask our community experts by visiting Answer HQ at http://answers.ea.com. Please do not hesitate to let us know if if you need any further assistance. You can reach us on help.ea.com.
Thank you once again for contacting EA!
Have a great day and stay safe!
Kind Regards,
Himanshi
<Me>
And another verification: redacted
Don’t y’all communicate with each other?
<CS Richa>
Hello,
How are you doing today? Thank you for contacting EA Help. My name is Richa. I’ll be your EA Help specialist today.
After reviewing your email, I learned that you want to merge the accounts.
Thank you for the code. Please do not worry. I certainly understand your concern. I will try my best to assist you with fixing this concern and I also apologize for the inconvenience caused.
I would like to inform you old EA games might not transfer correctly due to being sunset and that if they are not transferred they will lose access to them once the account is deactivated. Does you want to proceed?
We will look forward to your reply and appreciate patience and understanding on this matter.
Should you have any further questions regarding this or any other issues, please do not hesitate to let us know.
You can also find answers to common questions on our Help Center at
http://help.ea.com” or ask our community experts
By visiting Answer HQ at
“http://answers.ea.com“.
Follow EA support on Twitter for more news and information.
https://twitter.com/EAHelp.
Subscribe to EA Help on Youtube for video walkthroughs and guides.
Thank you again for contacting EA help. Be safe, stay healthy and take care of yourself.
<Me>
Tapped Out is the only game I care about on the old account. You may proceed.
<CS Vinay>
Thanks for reaching out.
So, as intimated earlier I would again like to reiterate that we won’t be able to merge the account however, we can transfer your content to the new account.
Let me know if you would like to proceed.
We will be waiting for your response.
You can check the status of your case from My Cases on EA Help.
If you need more information, check out these resources:
For game-specific help: Go to the EA Help home page, choose the game or product you need help with, and click See all help topics.
Visit Answers HQ to get help from other players in the community.
Follow @EAHelp for everything from outage info to game news.
Subscribe to EA Help on Youtube for video walkthroughs and guides.
Thanks for contacting us and have a great day!
<Me>
That’s what I want. Proceed.
<Me again, an hour later>
Do it, please.
<CS Ritika>
Hello there! thank you for contacting EA Help. My name is Ritika and I hope you’re doing well. I will assist you with your case today.
I completely understand your concern. Please be assured that I will try my best to assist you with the same.
Please share the email address?
I look forward to your reply:
For any query with EA games, you can always contact us or check our knowledge base at help.ea.com for self-help options and Answers.ea.com for in-game queries. We will be happy to help you with your concern.
It was a pleasure talking to you today. Thank you for contacting EA Help. Have a great day ahead!
Still need help? You can reach us on help.ea.com .
Ritika
EA Help
<Me>
We’ve been over this. There are 23 messages under this ticket number (redacted).
I want the stuff from my old account (redacted (redacted)) transferred to my current account (redacted (redacted))!
I’ve verified ownership of the old account 3 times now and the risks have been explained to me 3 times now. I’m starting to get pissed off.
<Me again, a correction>
The current account is redacted. I’m all flustered over here.
<CS Suhel>
Hi There,
Greetings from EA!
Thank you for contacting EA Help. My name is Suhel and I would assist you today with your concern.
I request you to confirm the email address so that we can assist you further.
We sincerely appreciate your time and patience. Looking forward to your reply.
Please feel free to contact us whenever you need our assistance. We will be more than happy to assist you. Still need help? You can reach us on help.ea.com.
Thanks & Regards
Suhel
EA Help
<Me>
My primary account: redacted (redacted)
My old account: redacted (redacted)
SOURCE: redacted (redacted)
DESTINATION: redacted (redacted)
My face right now:
\*gif of Angry kid in red shirt shaking a bottle while shouting “Angry!!!!!!”\*
<CS Rohit>
Thanks for contacting EA. My name is Rohit.
I hope you are doing good today! No worries will certainly help you with this.
In order to begin my investigation, Please Confirm the EA Account which will be your primary account
We await your response, please revert back to the same E-mail address.
You can check the status of your case from My Cases on EA Help.
If you need more information, check out these resources:
For game-specific help: Go to the EA Help home page, choose the game or product you need help with, and click See all help topics.
Visit Answers HQ to get help from other players in the community.
Follow @EAHelp for everything from outage info to game news.
Subscribe to EA Help on YouTube for video walkthroughs and guides.
Thank you for contacting EA.
<Me>
I already said the primary is redacted.
<CS Sunita>
Good morning,
Thank you for contacting EA Support! My name is Sunita. I hope this day goes well. I will be helping you today in connection with the report I received. I assure you that I will provide all relevant information on this subject. I understand your frustration. I see that you have been waiting for a long time. I recommend contacting us via live chat.
We do not have any number to share as there will be a dial-in option, otherwise we will be happy to provide it to you. If possible, please contact our live support team to allow us to provide better assistance and resolve this issue without further waiting. Here are the steps to contact our Live Support:
– Please go to https://help.ea.com/en/ .
– Please click Contact Us.
– Please select a product.
– Please select a platform.
– Please select a topic and then a problem.
– Please click the blue button (please select contact option).
– Please complete the Case Information and click Next.
– Select chat. I appreciate your patience and understanding in this matter. You can also find answers to frequently asked questions in the Help Center at http://help.ea.com or ask experts in our community by visiting Answer HQ at http://answers.ea.com. Please follow EA Help on Twitter, to receive current information. https://twitter.com/EAHelpThank you again for contacting EA Support. We encourage you to contact us again at https://help.ea.com if you require further assistance in resolving this issue or if you have any additional questions in the future. We wish you a nice day.
Best regards,
Sunita
<Me>
I can’t seem to get that to be an option… on *any* problem. Not even email.
<Me after finally getting chat to work>
I got into chat. The person who answered said it couldn’t be done. Now why would several email support agents tell me they could, then when I when it came time to do it, they ghost me?
<CS Ashish (I swear these can’t be real names)>
Thank you for contacting us back. My name is Ashish and I would assist you with your issue today.
I see that you’ve contacted us regarding merging your accounts. I will try my best to help you with the issue.
Thank you for the information. I can understand you frustration as I am also a gamer but no worries I am here to help.
I would like to inform you that we can only transfer the game but the progress will not be transferred.
Shall I proceed?
For any query with EA games, you can always contact us or check our knowledge base at help.ea.com for self-help options and Answers.ea.com for in-game queries.
Thanks again for contacting EA Help. It’s my pleasure talking with you and you’ve been great throughout the session. Have a great day ahead!
<Me oops, swype-o>
Tit all keep asking me that and I keep telling you “yes”. Yes! Yes! Do it!
<CS K… just K… and Sanjeev. There are two names in this one>
Hello! Thank you for contacting EA.
Hope all is well with you. Please accept my sincere apologies for not being able to resolve your issue in a timely manner due to the large volume of emails we receive these days.
Regarding this issue, I have reviewed your email and cannot determine if this issue has been resolved. Please tell us if you still need help? If no, and your issue has been resolved, please ignore this email.
While your issue is ongoing, please reply to this email with information that further describes the issue and we will be happy to provide you with the assistance you need.
We look forward to hearing from you.
Thank you for choosing EA, we look forward to providing you with further assistance.
For game-specific help: Go to the EA Help home page, choose the game or product you need help with, and click See all help topics.
Visit Answers HQ to get help from other players in the community.
Follow @EAHelp for everything from outage info to game news.
Subscribe to EA Help on Youtube for video walkthroughs and guides.
I am looking forward for your reply. If you have any questions, let us know.
Thanks for reaching out to EA Help.
I have tried to fetch the details, but I am sorry as at the moment our tools are experiencing some issues so we are unable to fetch your details. I have noted the details of the case redacted and that you contacted during an outage. we will definitely assist you in this issue.
Thank you for contacting EA. My name is Sanjeev and I will assist you with your issue today.
First, I want to apologize for the time taken to get back to you. Your case was stuck due to some technical issues. Undoubtedly, it is not your fault and we’re sorry to make you feel neglected. Trust me, it was never our intention and all our customers are important for us.
Coming on to the issue, I am unable to understand whether it got resolved or not. If you still need further assistance, then please contact us back.
You can check the status of your case from My Cases on EA Help.
If you need more information, check out these resources:
For game-specific help: Go to the EA Help home page, choose the game or product you need help with, and click See all help topics.
Visit Answers HQ to get help from other players in the community.
Follow @EAHelp for everything from outage info to game news.
Subscribe to EA Help on YouTube for video walkthroughs and guides.
Thank you for contacting EA Help, and have a great day.
<Me>
NO! IT HAS NOT BEEN RESOLVED!! You all keep asking me if I want you to proceed with the merge, yet when I tell you I do want you to proceed, you do nothing… literally nothing! Nothing has been done on this case except your colleagues giving me the runaround—telling me they can do things, then don’t do those things.
<Me again, they literally gave me a case number that’s not even one of mine>
What is case redacted? It’s not on my list.
<CS Shubham>
Thanks for reaching out.
As I have checked, there are no games in the account redacted and there is no PC game in the account egingell@gmail.com and we can only merge PC games if there are games in both the accounts, so if you only want to change the emails of the account, then we can do that for you.
You can check the status of your case from My Cases on EA Help.
If you need more information, check out these resources:
For game-specific help: Go to the EA Help home page, choose the game or product you need help with, and click See all help topics.
Visit Answers HQ to get help from other players in the community.
Follow @EAHelp for everything from outage info to game news.
Subscribe to EA Help on Youtube for video walkthroughs and guides.
<Me>
It’s only The Simpsons Tapped Out that I care about. It’s not a PC game, but it definitely exists in redacted.
<CS Viola>
Hello,
Thank you for contacting EA Support. My name is Viola, I will be your assigned EA Support Expert today. After reviewing your email, I came to know that the concern is regarding Merge of the account. Please be assured I will provide you all the relevant information about the same.
I appreciate for your patience and understanding on this matter.
We would like to inform you that we are not able to find the The Simpsons Tapped Out in the EA Account with the email: ‘redacted‘
Can you re-confirm to us as well is this the same account that you are facing an issue with?
I hope you’d find these instructions helpful, but don’t hesitate to contact us further if you need any assistance with EA Products. You can also find answers to common questions on our Help Center at http://help.ea.com, or ask our community experts by visiting Answer HQ at http://answers.ea.com. Follow EA Help on Twitter for more updates. https://twitter.com/EAHelp
Thank you again for contacting EA Help! And please feel free to reach out to us again through https://help.ea.com in case you need further assistance with this issue or any further queries you might have in the future.
Be safe, stay healthy and take care of yourself.
Best wishes,
Viola
<Me>
I can assure you with absolute certainty that there is indeed a Tapped Out game using the email address redacted.
Here’s a video proof of just how certain I am (it’s me logging in with said email address).
redacted
<CS Rajiandai>
Thanks for reaching out EA. I hope you are doing well. This is Rajiandai from EA Help following your case regarding merging your accounts.
Don’t worry, we will provide you all the relevant information about the same.
Thanks for your patience.
Upon checking your accounts, it seems that there is no PC game on your redacted account so, we cannot transfer the game means we cannot do the account merge for this account.
As have stated in the disclaimer shared previously which says:
We can only transfer all Origin/the EA app PC games that are in the account. ⚠️ We can’t transfer only one or a few games.
Because of this reason we won’t be able to do the merge for this account.
Should you have any further questions regarding this or any other issues, please do not hesitate to let us know.
You can check the status of your case from My Cases on EA Help.
If you need more information, check out these resources:
For game-specific help: Go to the EA Help home page, choose the game or product you need help with, and click See all help topics.
Visit Answers HQ to get help from other players in the community.
Follow @EAHelp for everything from outage info to game news.
Subscribe to EA Help on YouTube for video walkthroughs and guides.
Thank you once again for contacting us!
This app no longer functions!
Since the current Boggle with Friends app freezes consistently on my Samsung Galaxy A32 5G with Android 12 and even on my Motorola Moto Stylus 5G 2021 with Android 12 (must be an Android 12 thing), I decided to dust off the old Word Streak app to see if it still works. Surprisingly, it does, but there are a few caveats:
- Chat doesn’t work.
- “Daily Quests” is not a thing; however, you do get the “Daily Spinner”.
- There are a lot of annoying notifications.
- Since Google+ is no longer a thing, you can’t log in with it.
- Sometimes games will start themselves before you can pick your power-ups.
If you’d like to download it, click here (on Aptoide).
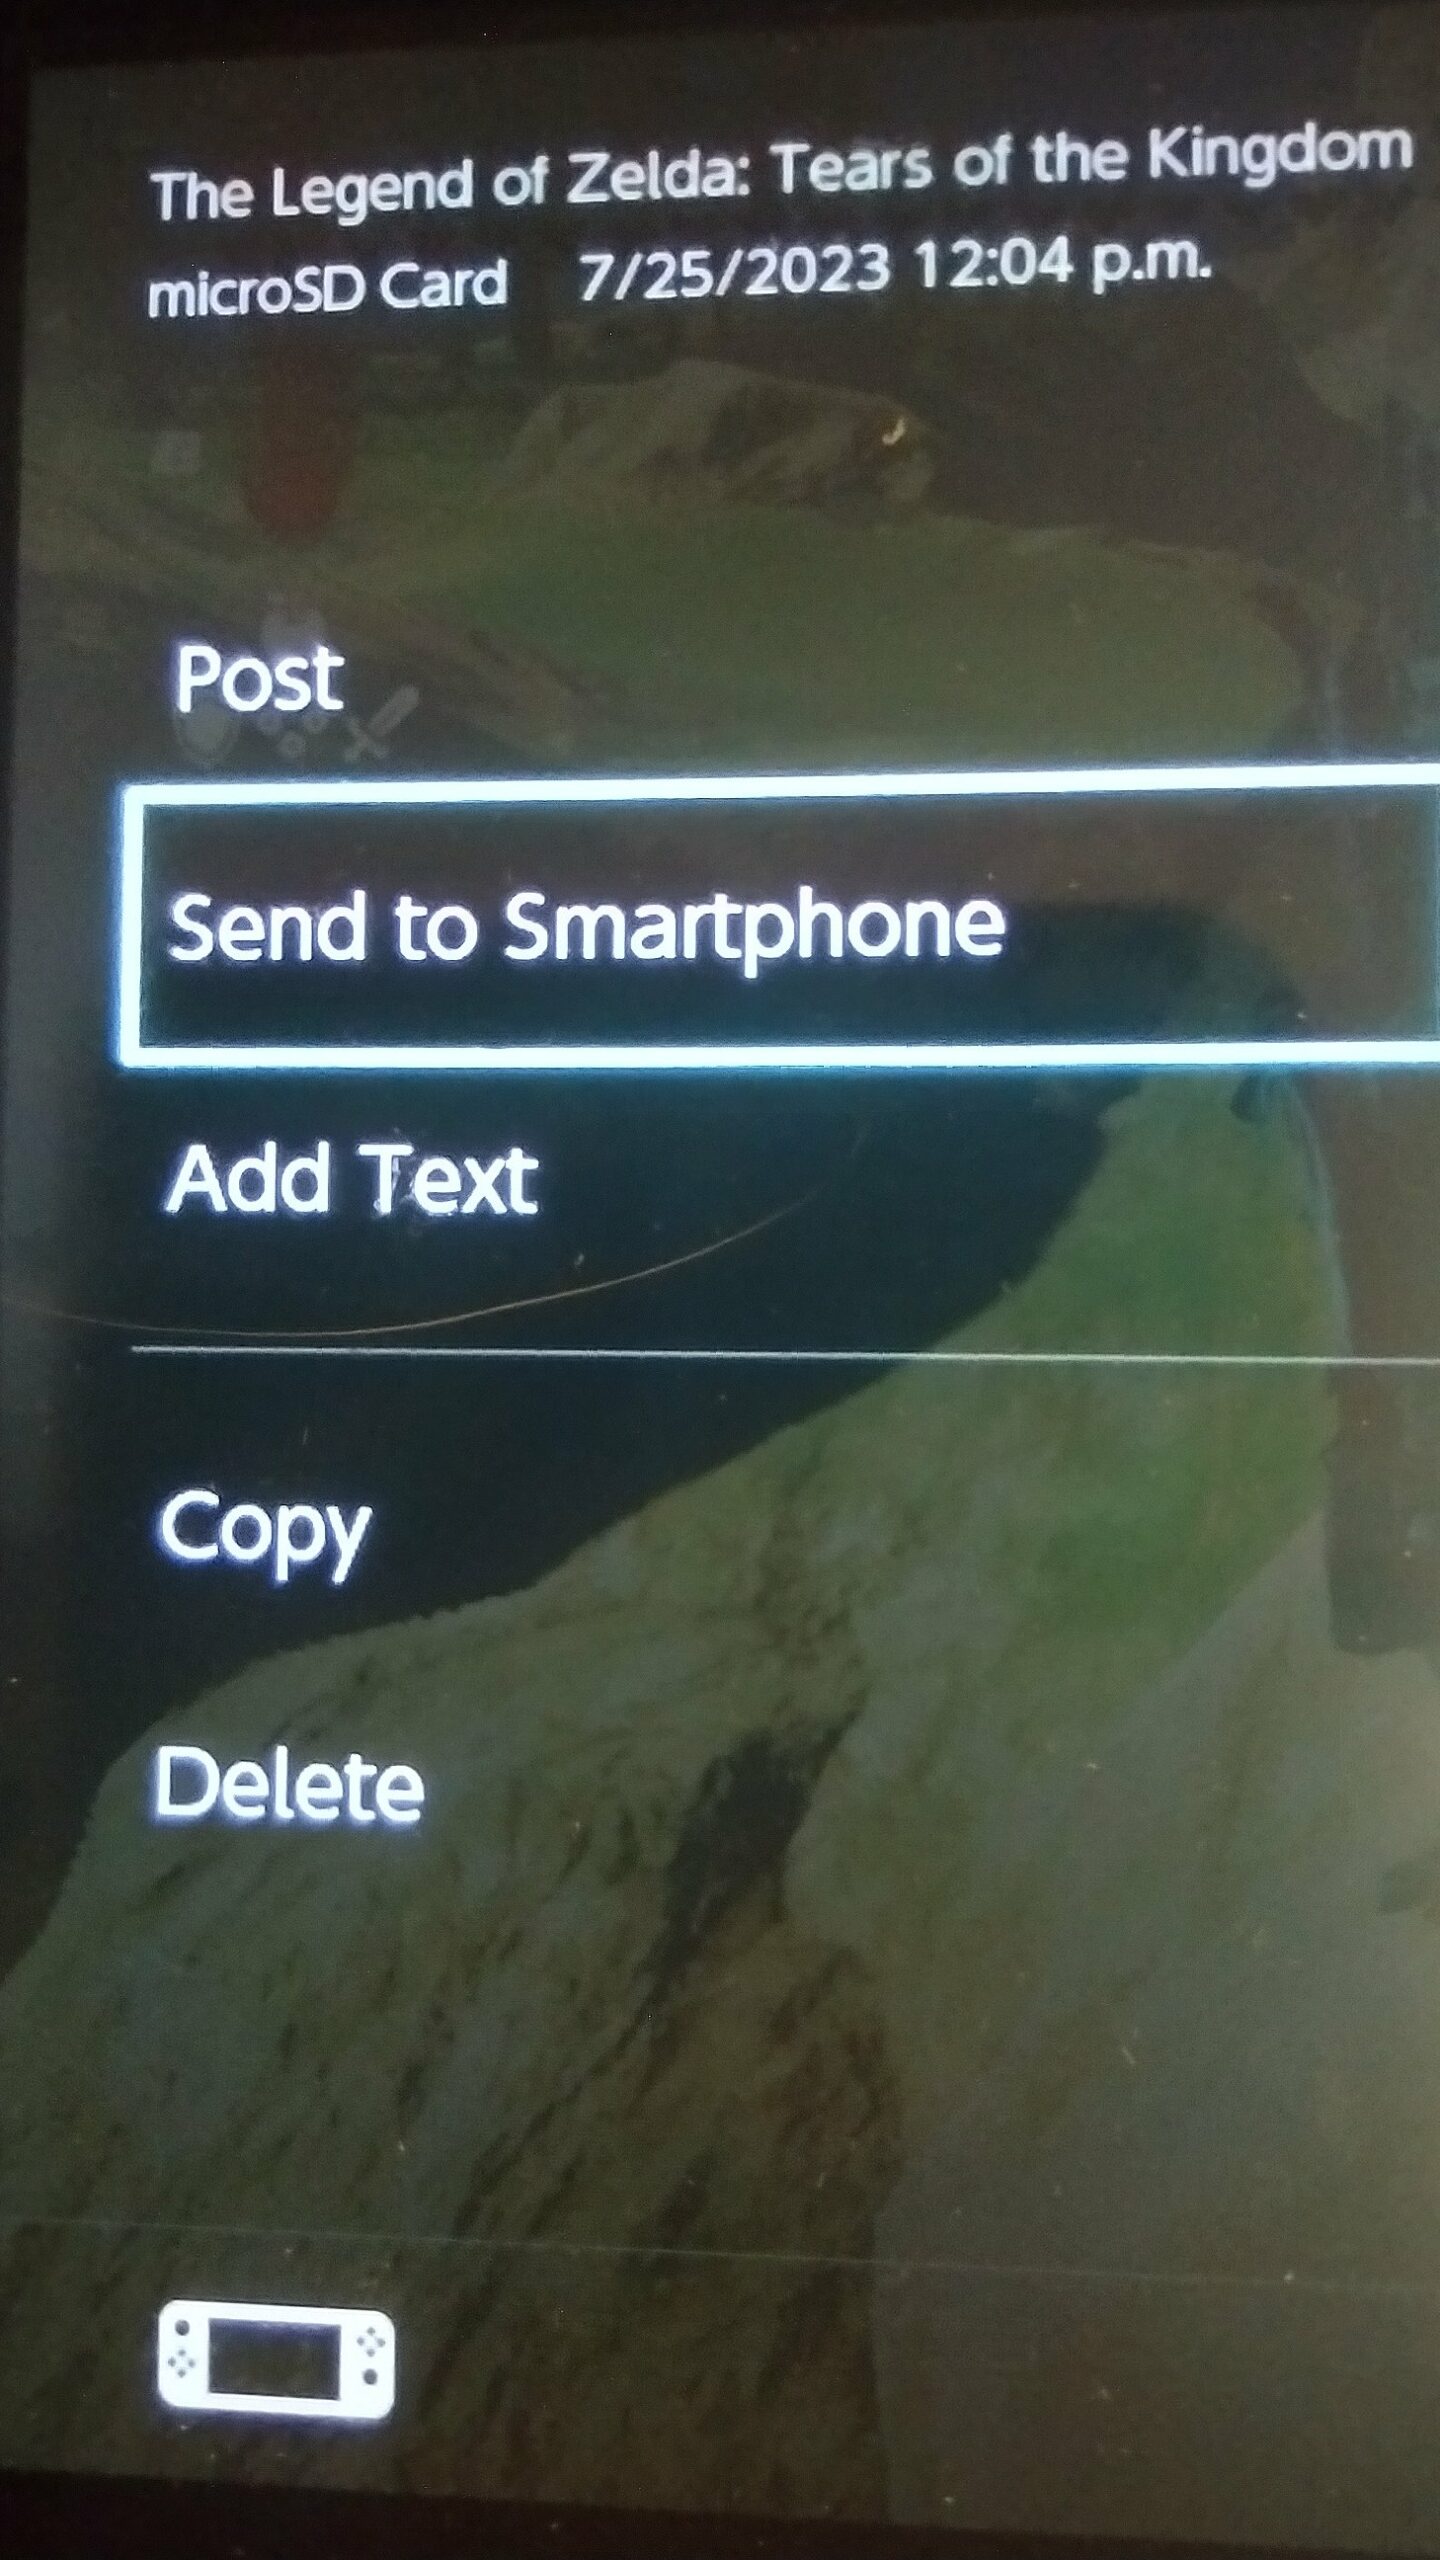
- Go to your album and select the desired screenshot, then press A or touch “Sharing and Editing”.
- From this screen you can either select “Post” and send it/them to Facebook or Twitter and download them from there or select “Send to Smartphone”. For best results, choose the latter.
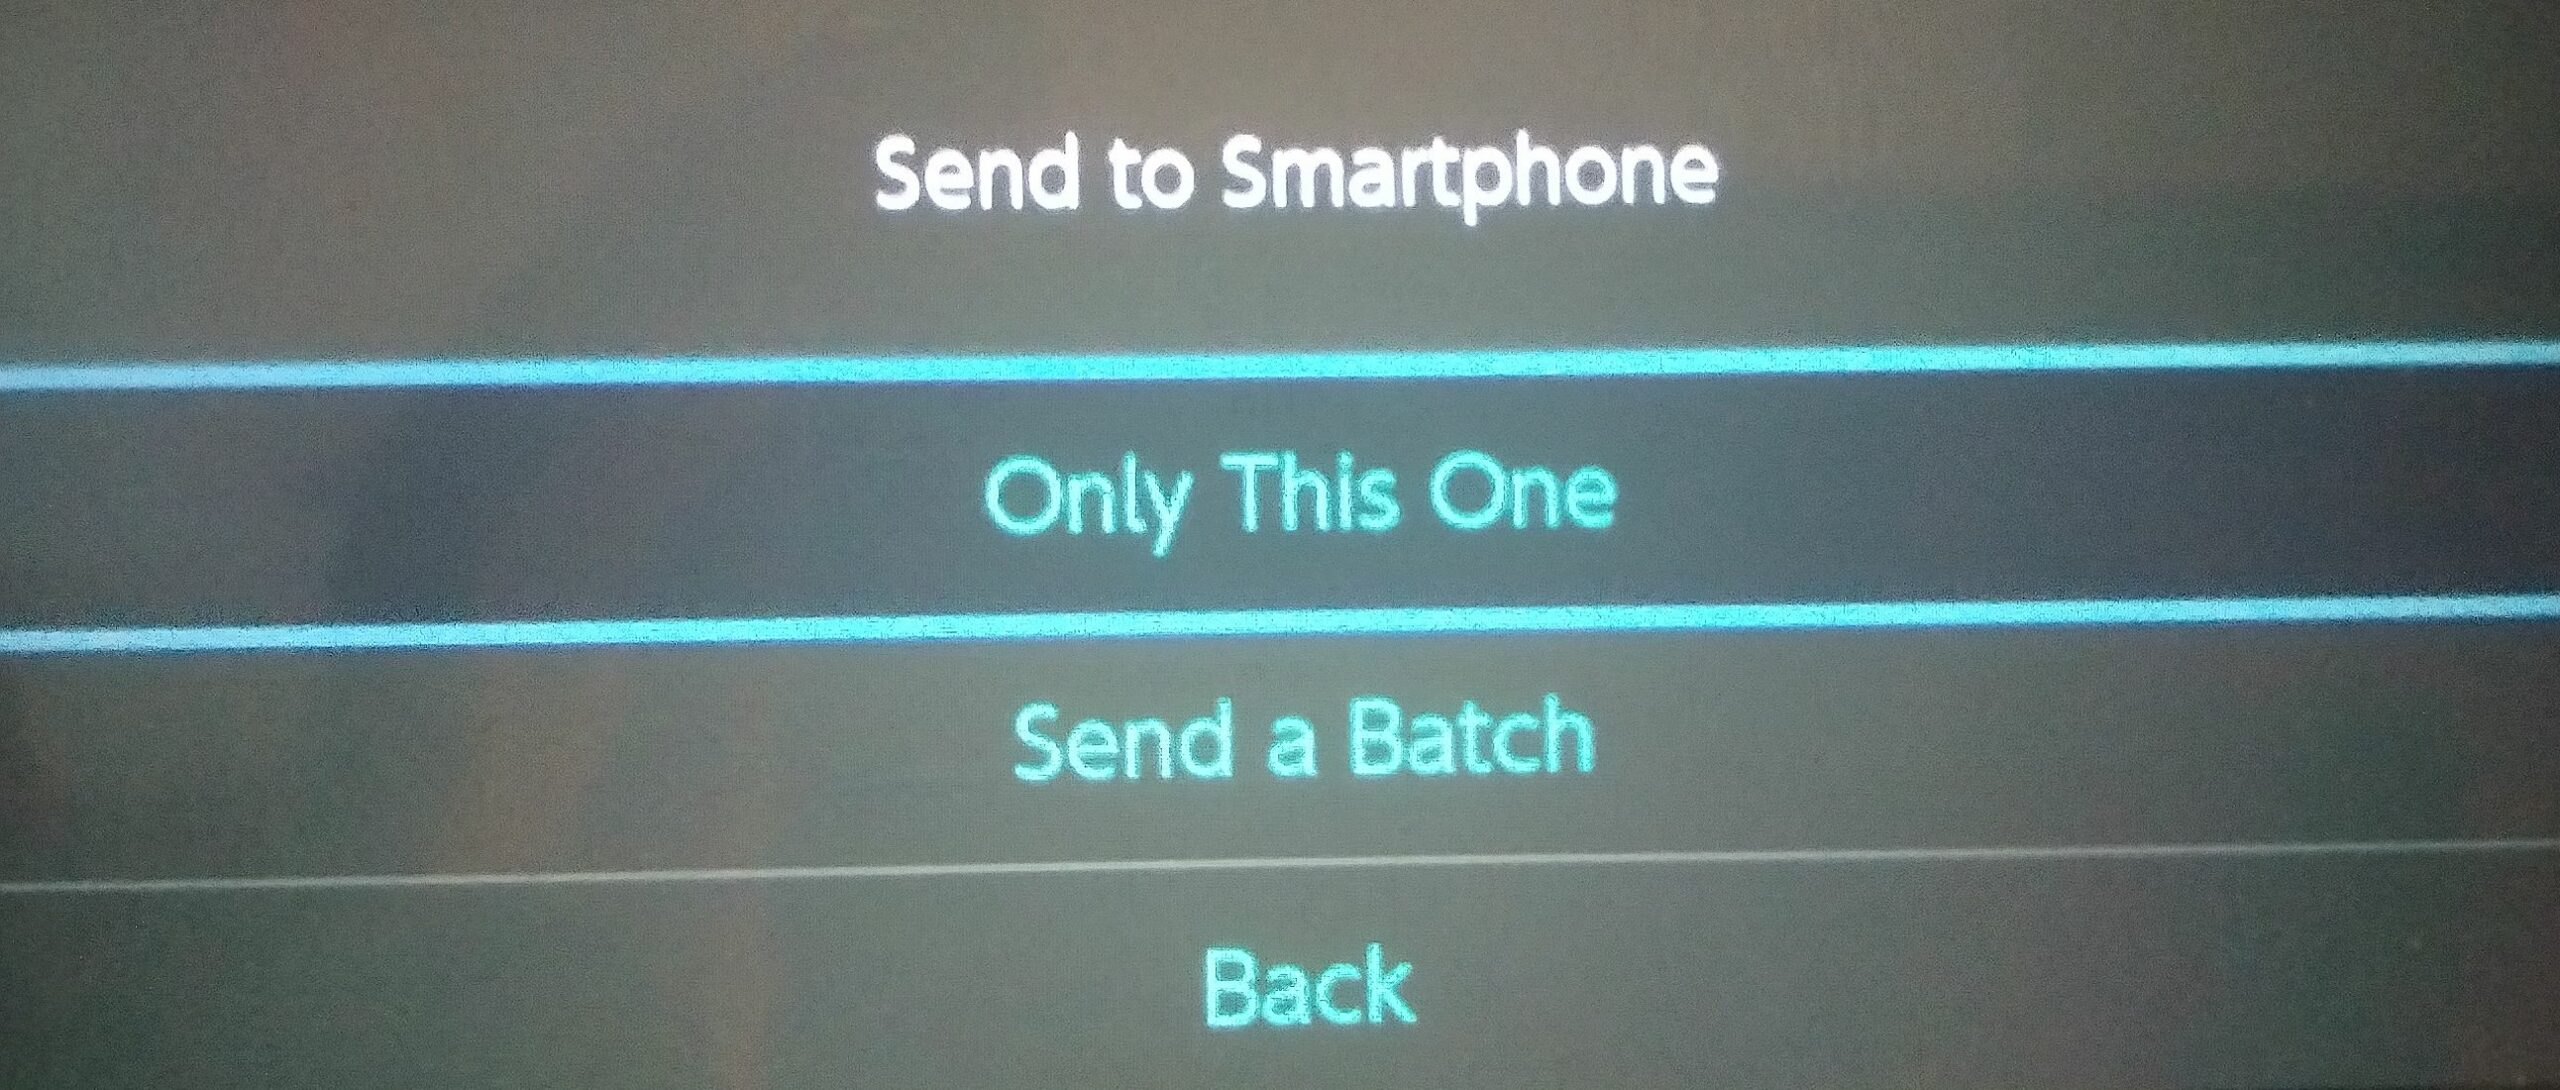
- From the following, you can choose to either send one or more than one (more than one is not an option for videos).
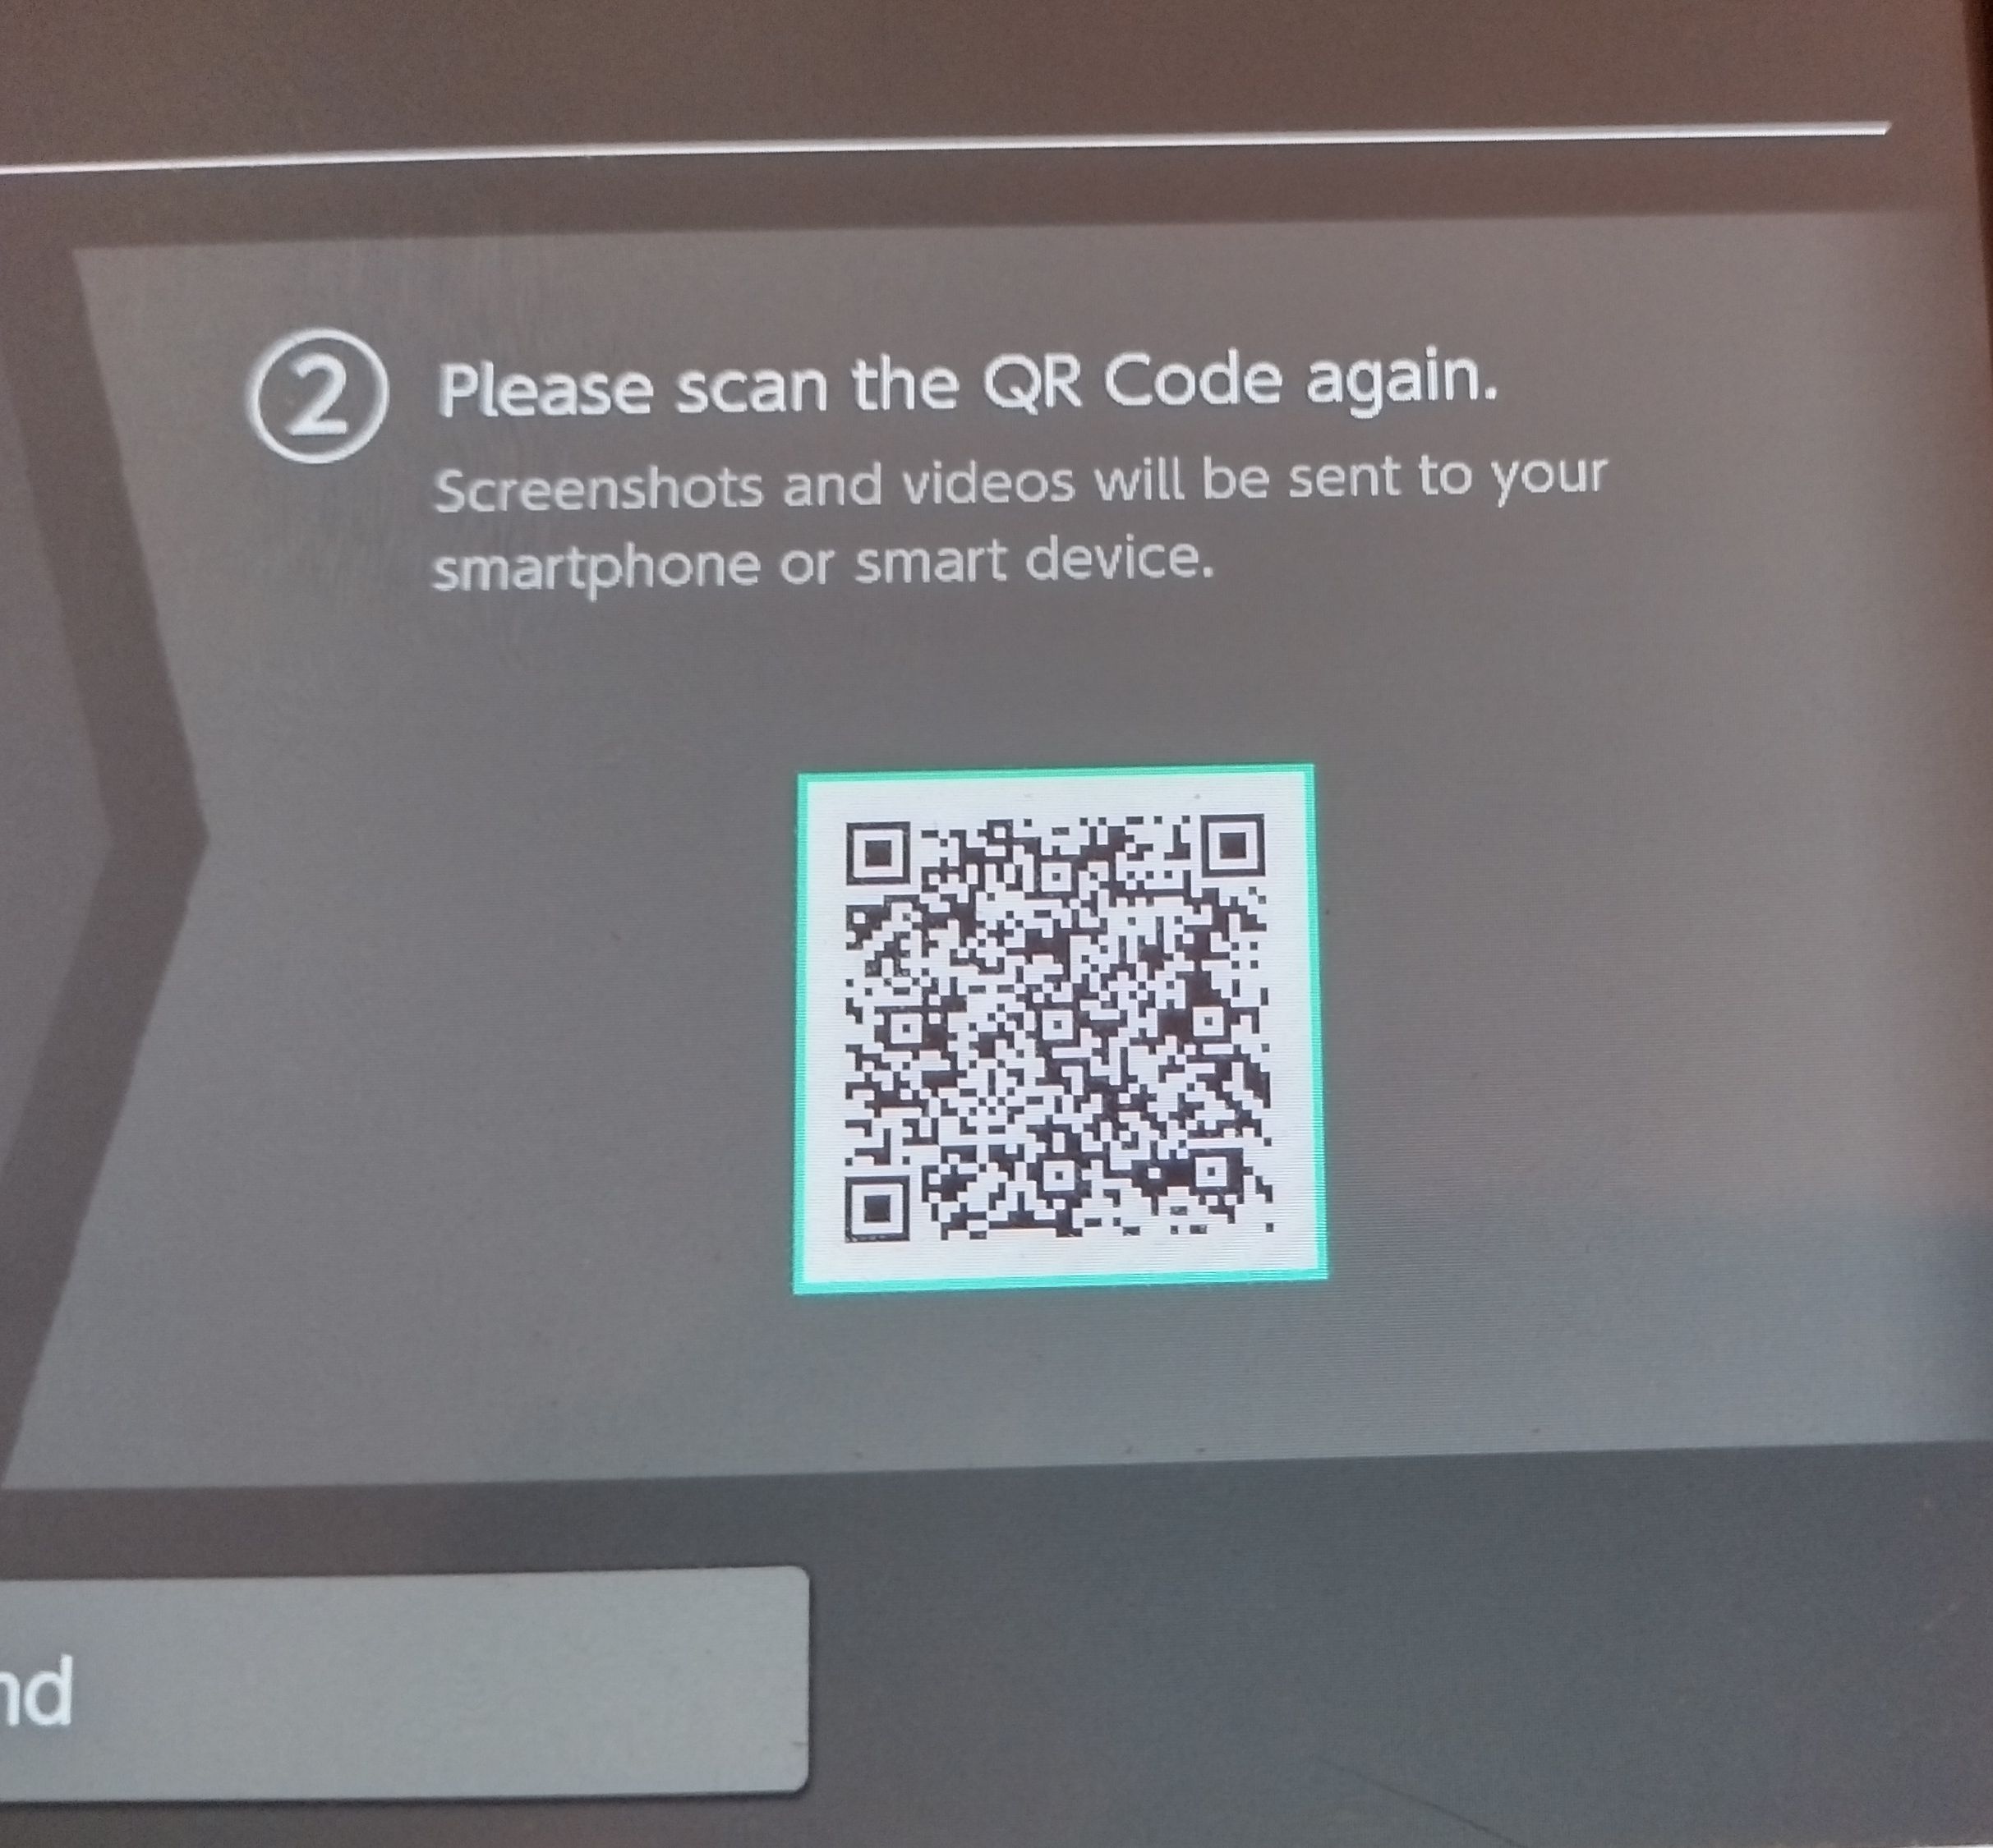
- Either way, the next screen will assist in connecting to the Switch’s ad-hoc Wi-Fi hotspot.
- Scan the QR code and connect to the hotspot.
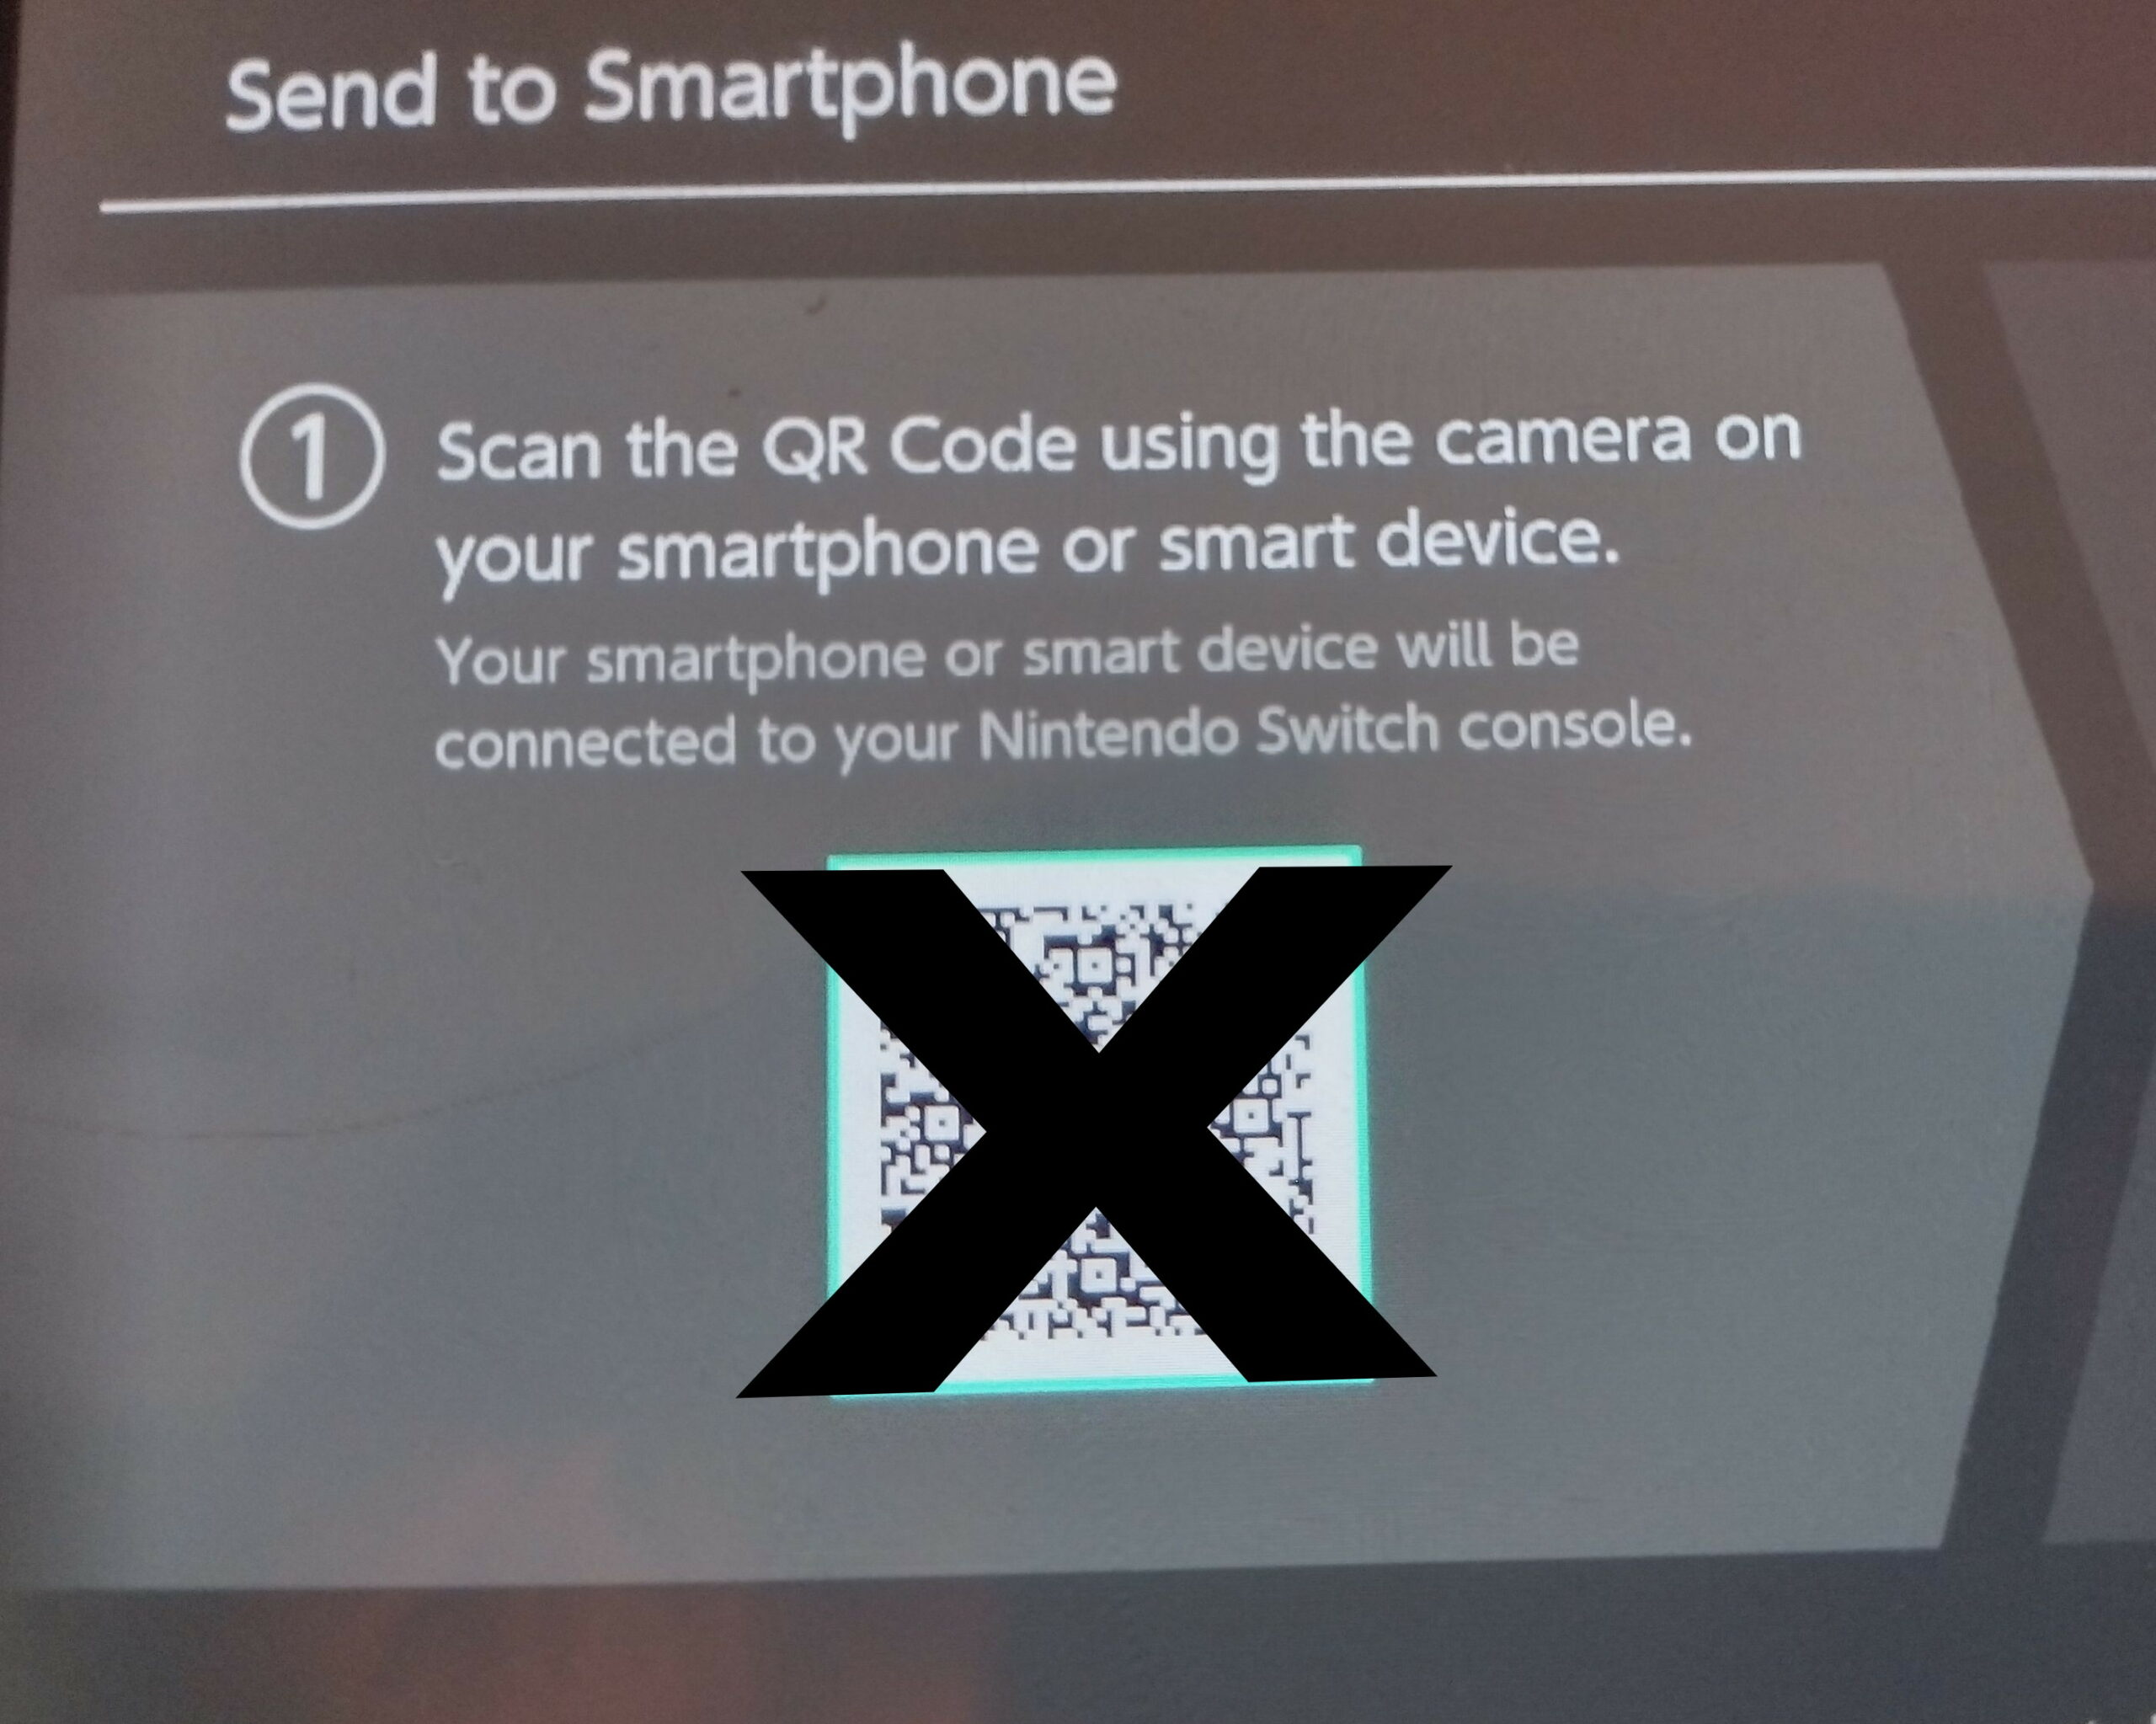
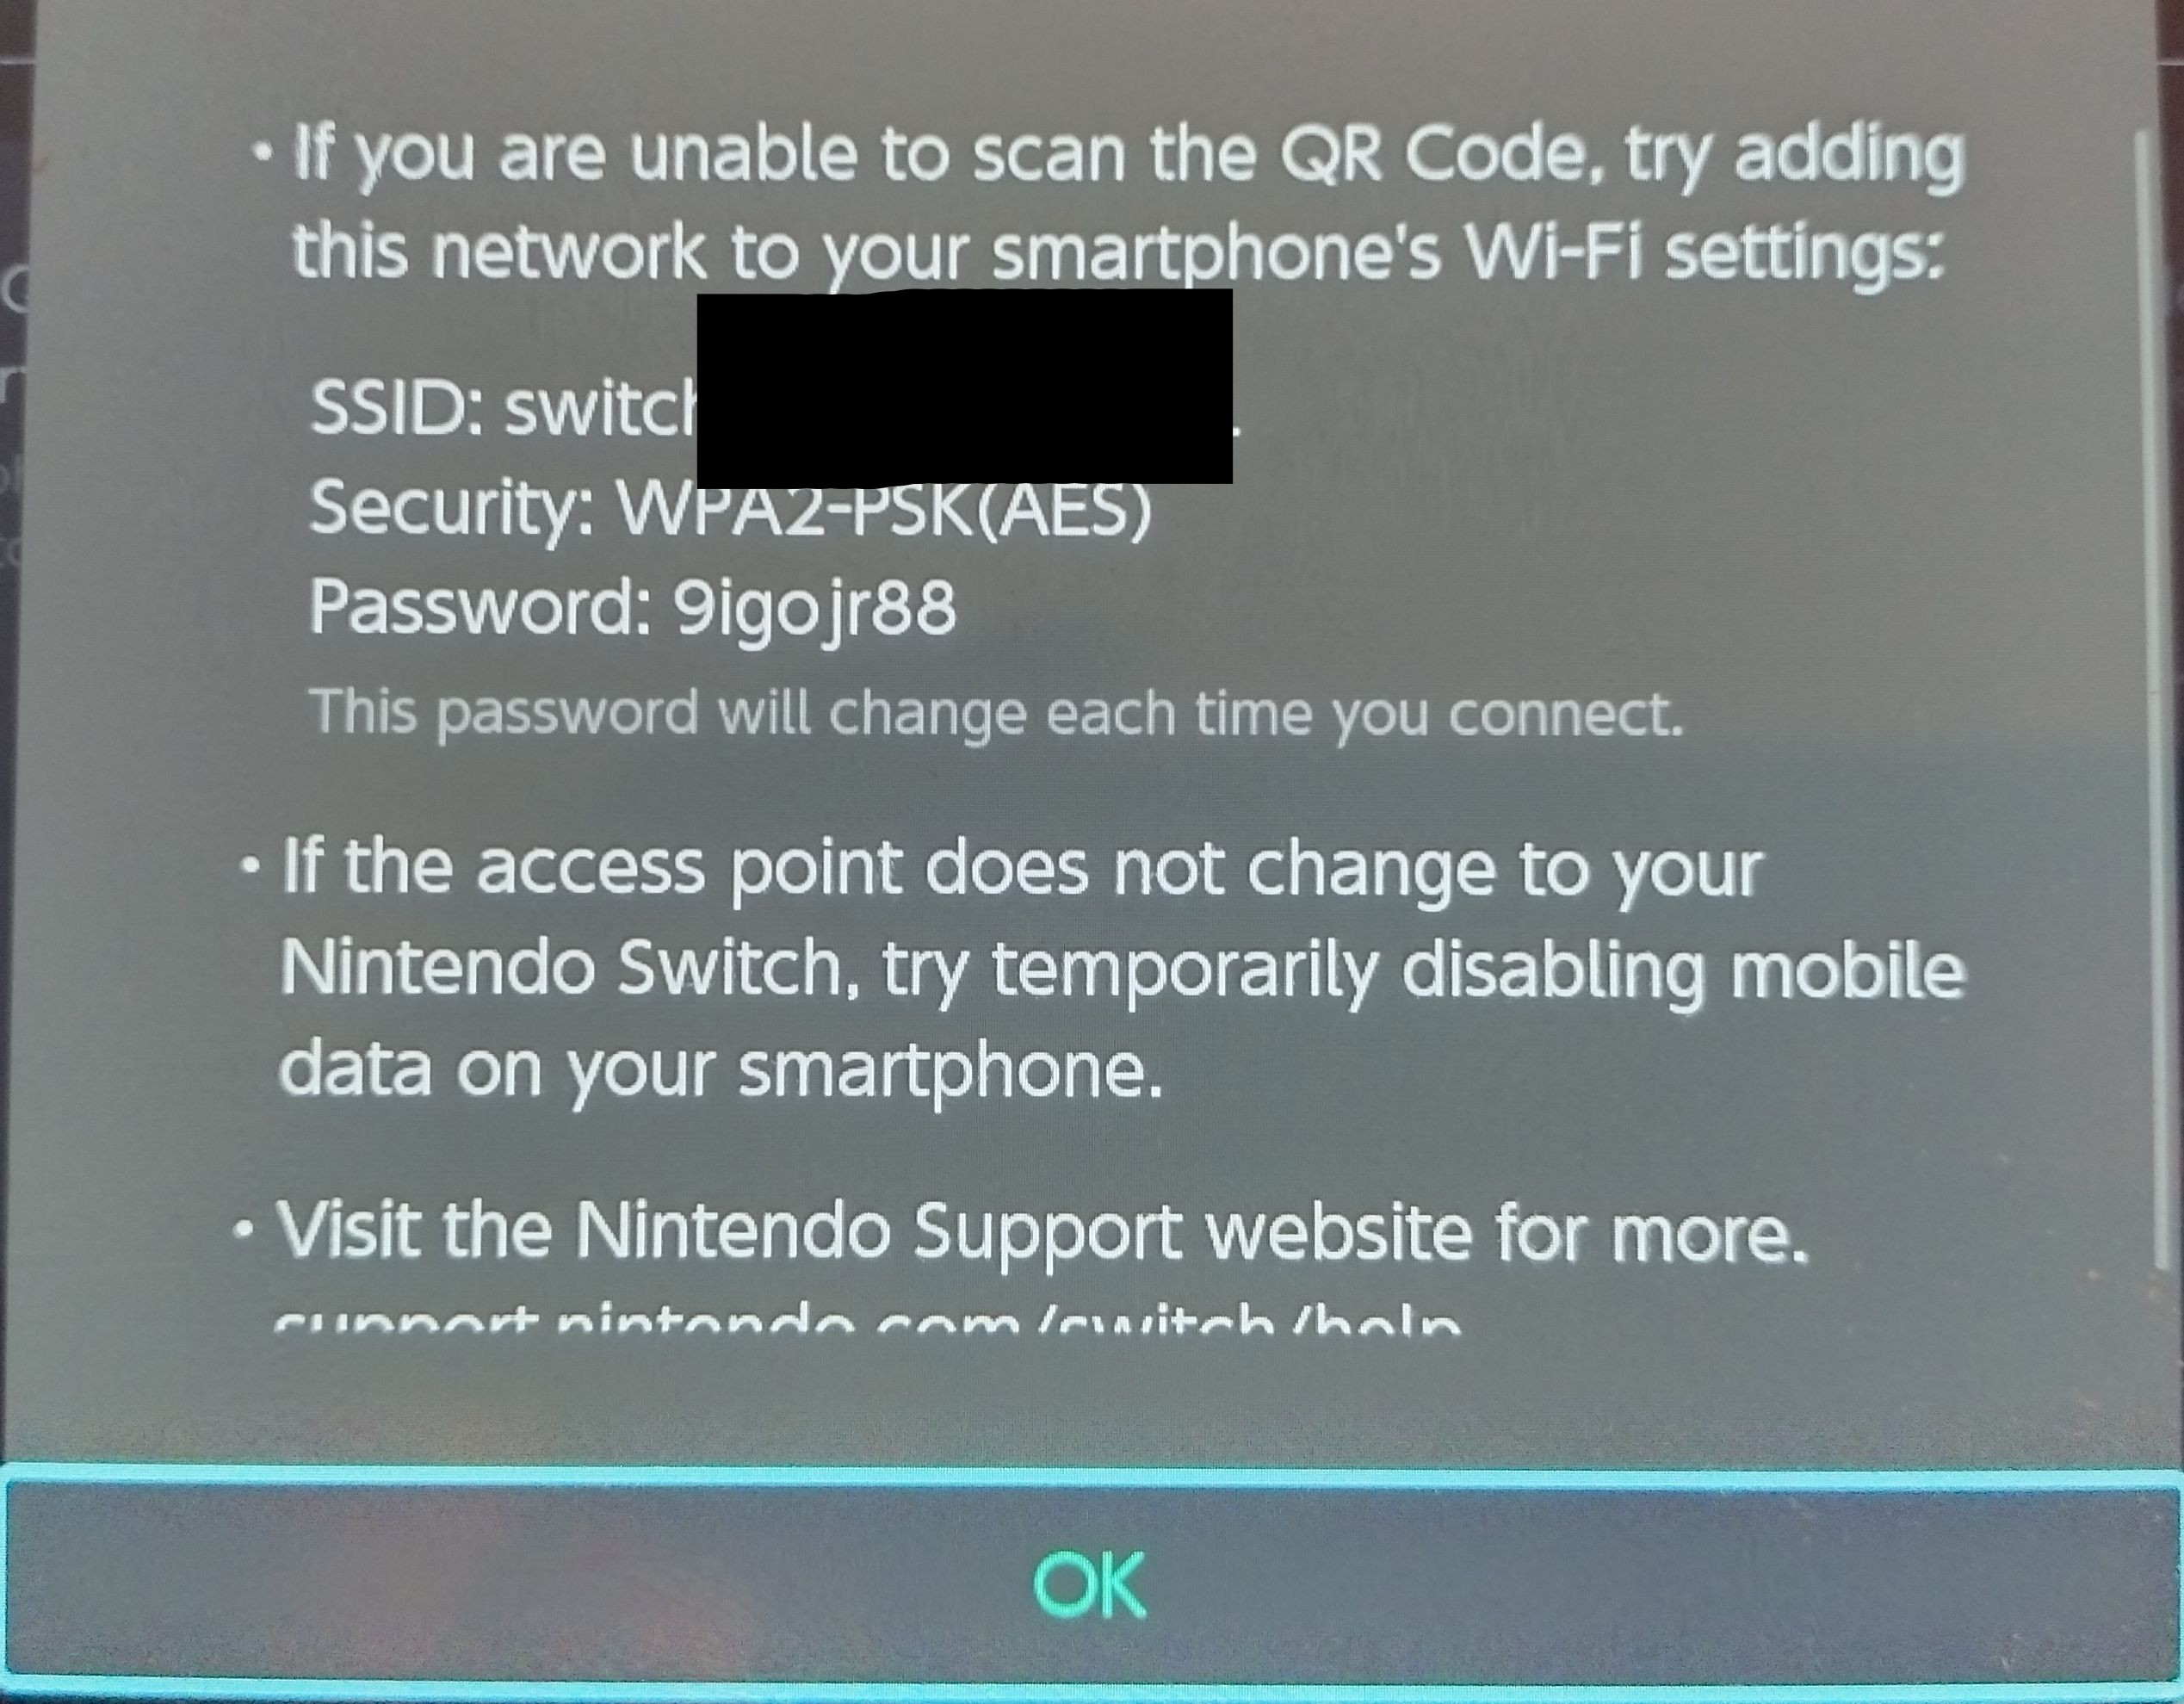
- If you can’t scan QR codes, press the “+” button or touch “Trouble connecting?” for the hotspot info and connect to it yourself. The password is random, but the SSID will always be the same.
- Your device does not have to be a phone. It can be anything with Wi-Fi and the ability to download images and videos, even a laptop or PC.
- Once you connect, the screen will change. Scan the new QR code. This one opens your web browser to the Switch’s web interface.
- Note: your device will not have internet access, so if it asks you if you want to stay connected to this Wi-Fi, click yes.
- If you can’t scan the QR code, press the “+” button or touch “Trouble connecting?”. This will tell you where to point your browser to. It’ll probably be “http://192.168.0.1/index.html” like in my screenshot below.
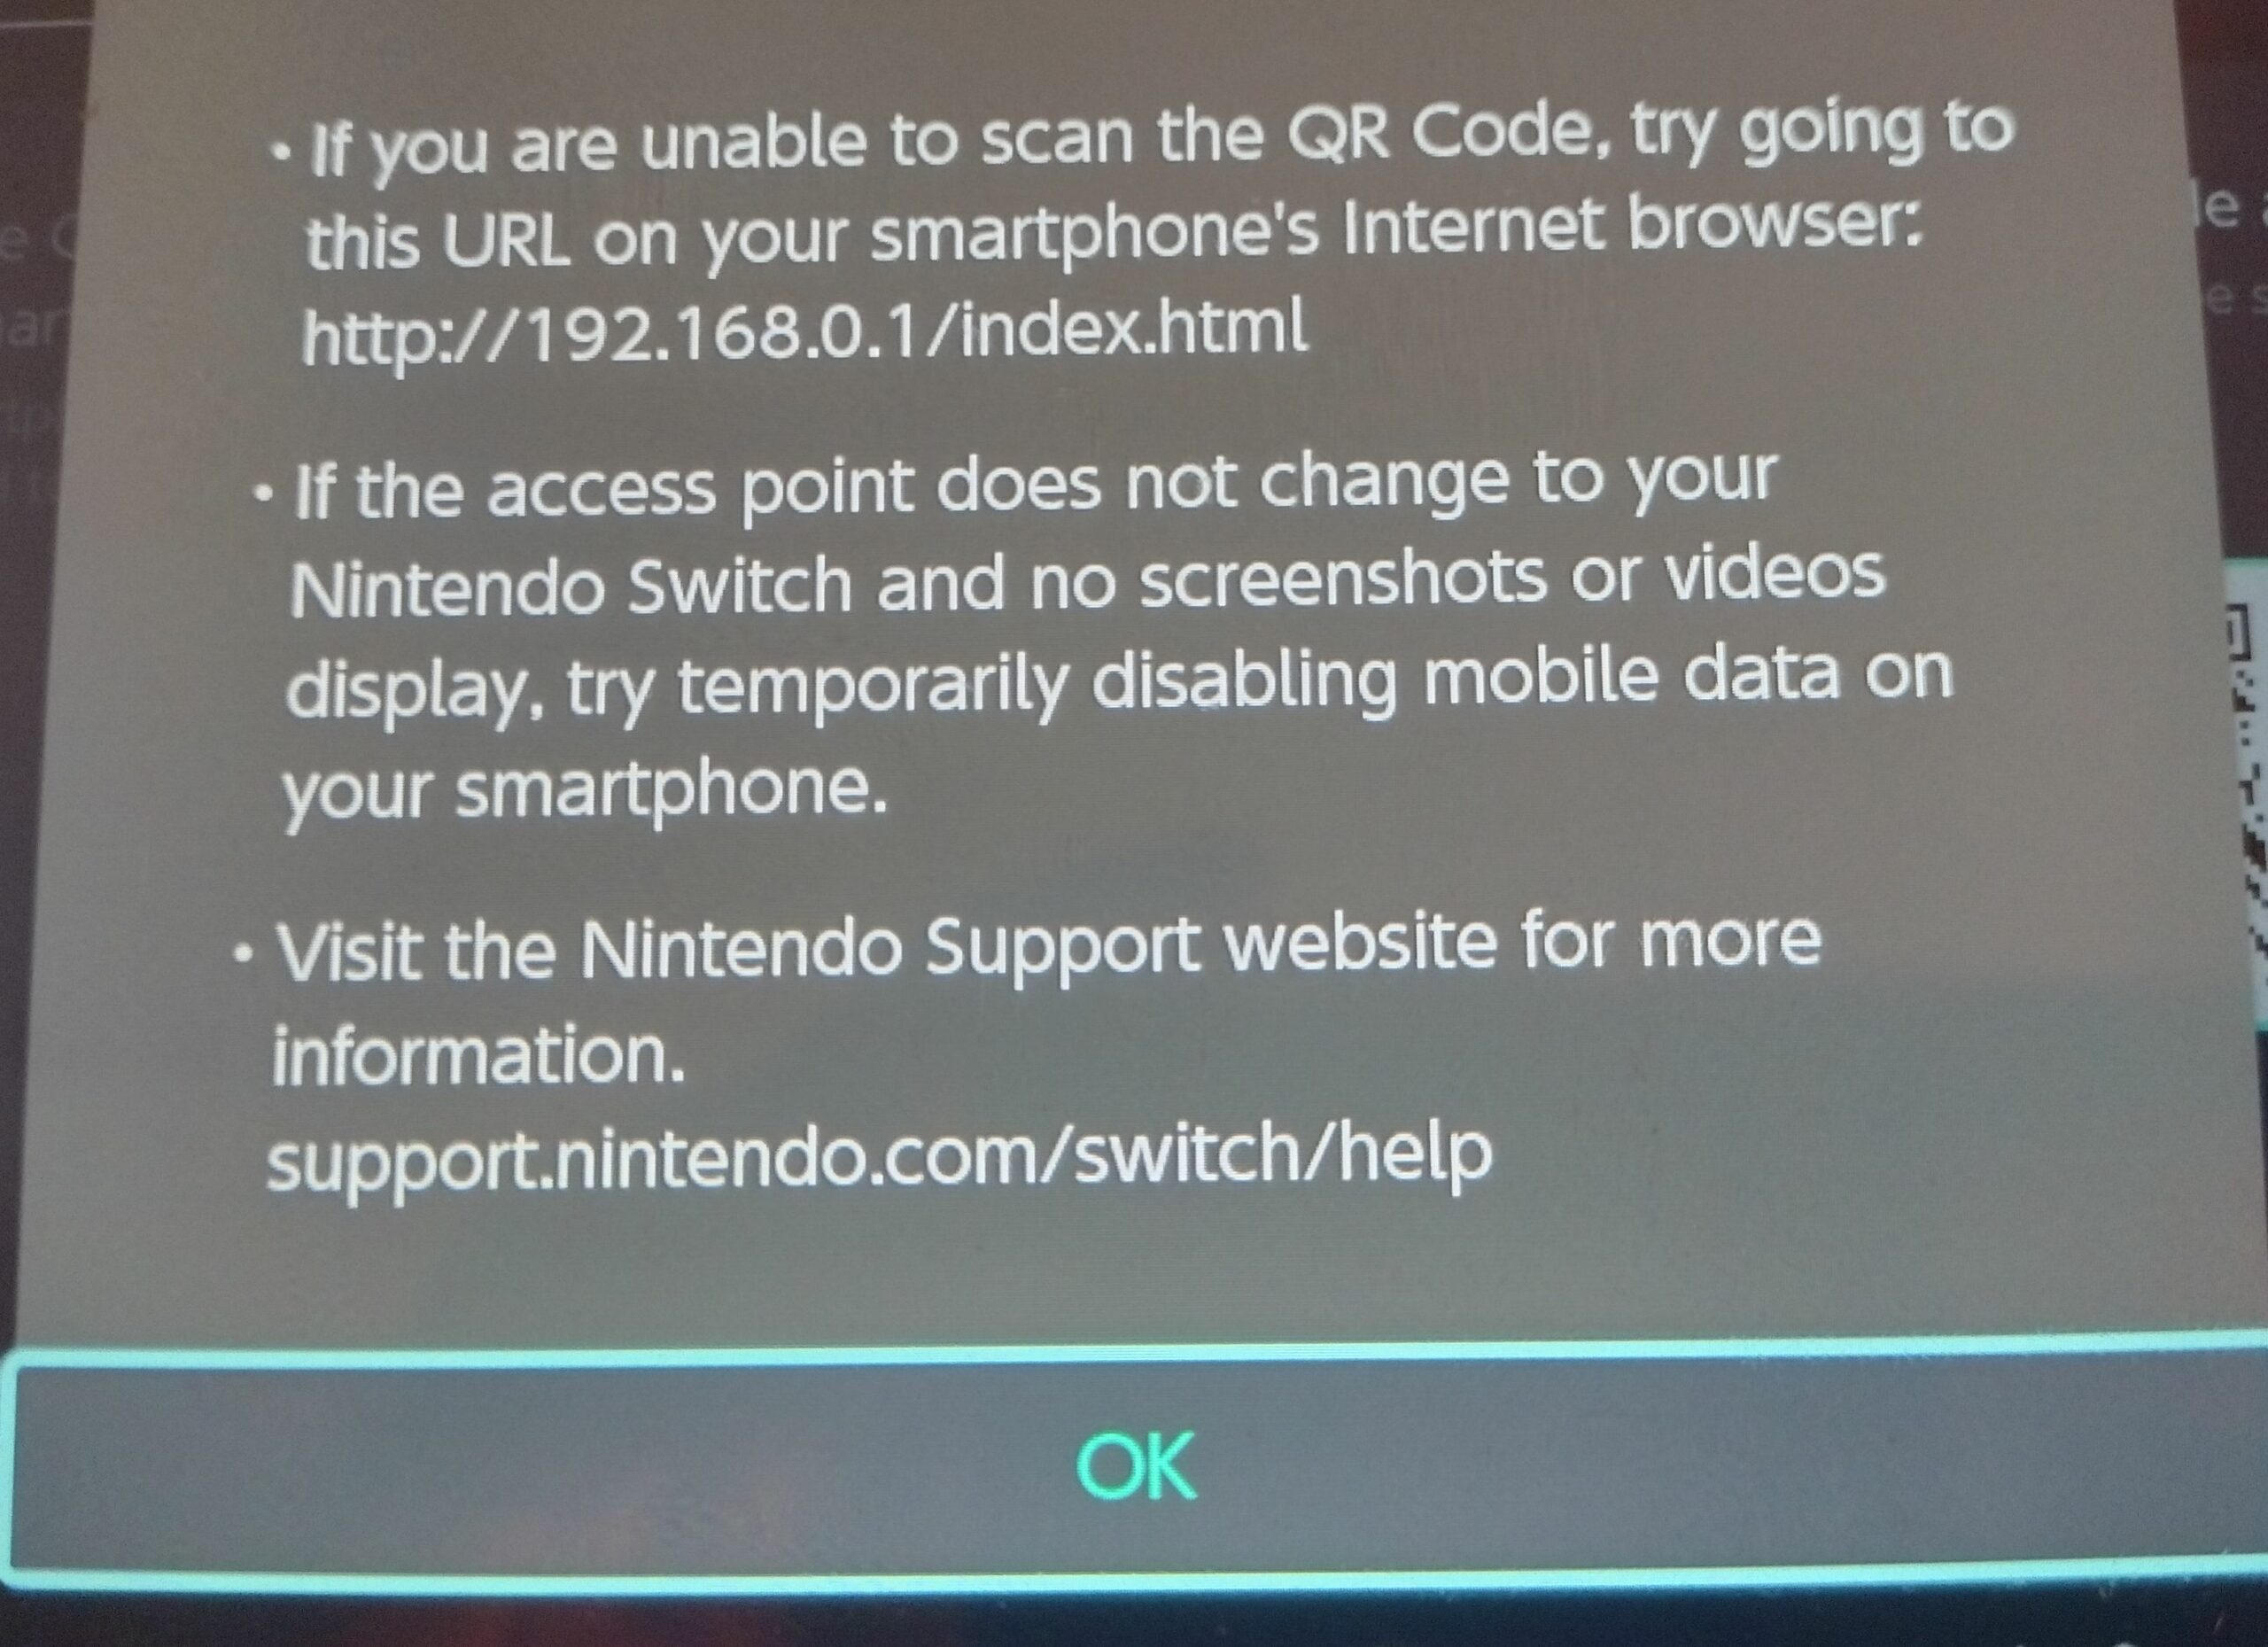
- The page contains linked thumbnails of your selected screenshots. Just download them.
- Go back to your Switch and press the Home or B button or touch “Back” or “End” to disconnect. Your device will switch back to the previous connection. If not, you know what to do.
- Ironically, I had to take the above screenshots with my phone because the Switch won’t allow you to screenshot system menus.


Guardian Tales is a great game. 8/10 stars. It is a free RPG available on the Nintendo Switch, Android, and Apple. I, however, am not here to review the game, I’m here to point out key differences between the Switch and Android versions (I don’t have an Apple device, so I can’t comment on that version except in regards to the coupons).
- Color Code
- [S] Switch
- [A] Android
- [Ap] Apple
- [All] All
- Caveats
- [A] I don’t play on the Android, so if anything is wrong, that’s why.
- [Ap] I don’t have an iPhone or any other Apple device, so if anything is wrong, that’s why.
- Available Chapters
- [S] 1-12 on Normal, 1-9 on Nightmare, and 0 on Hell.
- [A] 1-15 on Normal, 1-12 on Nightmare, and 0 on Hell.
- Equipment Modification
- [S] Equipment level is capped at 75 (80 with Limit Break).
- [A] Equipment level is capped at 84 (89 with Limit Break).
- Side Stories and Short Stories
- [S] There are only 5 side stories (1 of them is seasonal (Christmas)) and 7 short stories (1 of them is seasonal (Halloween)).
- [A] There are numerous side stories and short stories.
- Coupons
- [S] Coupons submitted in-app.
- [A] Coupons submitted in-app.
- [Ap] Coupons submitted via website.
- Towers
- [S] Heavenhold Tower up to level 60.
- [A] Heavenhold Tower up to level 58.
- [S] No Tower of Horizon (Strange Cube).
- A Bunch of Nos
- [S] No WORLD CLEAR PASS.
- [S] No “Forums” or “Enhance” on the World Map menu.
- [S] No fishing.
- Guild
- [S] Guild Introduction has canned selections to choose from.
- [A] Guild Introduction is free-form (i.e. you can put in whatever you want).
- Controls
- [S] Touch screen controls don’t extend to inside dungeons.
- [S] Run and Action/Talk are separate buttons.
- [A] Run and Action/Talk are the same button.
- Servers
- [S] There is one World server.
- [A] There are two World servers.
- Voice Acting
- [All] Some of the voices are different.


Welcome to egingell’s SGS2 info page
You’re here because you’re curious about what I have done to my phone, otherwise you wouldn’t have clicked. Well, read on.
- Use Link2SD Without a Second Partition – E4GT
- Clean up Link2SD’s Trail.
- Copy Multi DPI Google Play Store and Google Services Framework
apps to system compensating for the /preload partition. - Delete Bloatware – SGS2
- My ROM: Stock Rooted Jelly Bean 4.1.2-GB27 – I’m sticking with stock until Samsung allows one-click toggling of WiMAX.
- Recovery: Stock GB27 – I have no need or desire to flash a custom Recovery. You can do everything a Recovery can do from a live boot.
That’s right, kids, one can clear the dalvik cache, clear all app data, clear the cache, and push files to /system or /preload without using
a custom recovery. You can even flash a modem, recovery, or kernel. I use
Root Explorer. The latest version incorporates a SMB client, so I can get files from my PC easily and paste them directy to whichever
protected directory I want and set appropriate permissions. I use ADB only when I don’t want to type out shell commands on the phone’s
tiny keyboard or “oops” emergencies. - I have enabled init.d boot up scripts by renaming ‘/system/bin/debuggerd’ to ‘/system/bin/debuggerd.bin’ and I’m using ‘/system/bin/debuggerd’
as a middle-man script for the debugger daemon to use busybox’s ‘run-parts’ to execute the scripts in ‘/data/local/init.d’
as well as do the mounting and binding and then execute ‘/system/bin/debuggerd.bin’. - I lifted ‘/system/bin/bootanimation’ from rujelus22’s Blu Kuban – JB ROM
and replaced the original with it to enable custom boot animations. - I changed my boot splash screen using Hellcat’s SGS2
BootScreen Changer. - My SanDisk 32GB SDHC card is layed out thusly:
root@android:/ # cat /sdcard/extSdCardInfo.txt
                     Device   Blocks Info
/dev/block/cyasblkdevblk0p1 30843904 ->/storage/sdcard0
/dev/block/cyasblkdevblk0p2   320512 x>/storage/extSdCard - not mounted
root@android:/ #
- My internal SD card is layed out thisly:
root@android:/ # cat /sdcard/intSdCardInfo.txt
               Device   Blocks Info
 /dev/block/mmcblk0p1    20480 EFS
 /dev/block/mmcblk0p2     1280 Boot 1
 /dev/block/mmcblk0p3     1280 Boot 2
 /dev/block/mmcblk0p4     8192 Param
 /dev/block/mmcblk0p5     8192 Kernel
 /dev/block/mmcblk0p6     8192 Recovery
 /dev/block/mmcblk0p7   307200 ->/cache
 /dev/block/mmcblk0p8    16384 Modem
 /dev/block/mmcblk0p9   524288 ->/system
/dev/block/mmcblk0p10  2097152 ->/data
/dev/block/mmcblk0p11 12066816 ->/data/sdext2 - reformated as EXT4.
/dev/block/mmcblk0p12   319488 ->/preload
root@android:/ #
- I have a bootup script in /data/local/init.d that scans /data/sdext2/data for directories to bind to matching directories in
‘/data/data’. - My ‘/system/bin/debuggerd’.
root@android:/ # cat /system/bin/debuggerd
#!/system/bin/sh
#added by link2sd
LOG=/data/link2sd-debuggerd.log
echo "$(date) mounting..." > $LOG

mount -t ext4 -o rw,noatime,barrier=0,nobh,errors=continue /dev/block/mmcblk0p11 /data/sdext2 1>>$LOG 2>>$LOG

echo "" >> $LOG
echo "init.d" >> $LOG

/system/xbin/busybox run-parts /data/local/init.d 1>>$LOG 2>>$LOG

echo "" >> $LOG

mount >> $LOG
echo "$(date) mount finished" >> $LOG
echo debuggerd.bin launched >> $LOG
exec /system/bin/debuggerd.bin
root@android:/ #
- My ‘/system/etc/vold.fstab’.
root@android:/ # cat /system/etc/vold.fstab ## Vold 2.0 Generic fstab ## - San Mehat (san@android.com) ## ####################### ## Regular device mount ## ## Format: dev_mount
- My binding script.
root@android:/ # cat /data/local/init.d/12symlink
#!/system/bin/sh
LOG=/data/symlink.log;
echo "Symlink" > $LOG

busybox mount -o rw,remount /system

cd /data/sdext2/data/

for APP in *; do
        mount -o bind "/data/sdext2/data/$APP" "/data/data/$APP" 1>>$LOG 2>>$LOG;
done

busybox mount -o ro,remount /system
root@android:/ #
Disclaimer: I don’t have an iPhone, so I can’t confirm whether these work on its version of Draw Something.
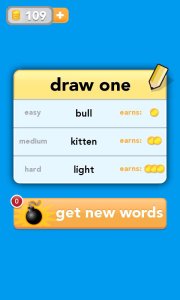
Exit the game and start it again for the following:* Get new words without using a bomb. This works even if you’re in the process of drawing something.
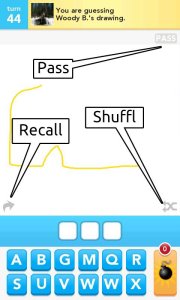
* Watch your friend draw from the beginning.
* Hide your guesses if you haven’t guessed correctly, yet.
* Get new letters from which to use to guess the picture.

Guessing:
* You can start guessing at any time.
* You get unlimited tries.
* You can shuffle the letters by tapping the crossing double arrow on the right, just above the letters.
* If you are just not getting it, tap “Pass” in the top right corner. This will end your streak.
* You can take back all of your letters by tapping the circular single arrow on the opposite side from shuffle icon.
* You can either tap the letter to place it in the next empty guess slot or drag it to whichever guess slot you want. You can even drag letters from guess slot to guess slot. Tapping guess slot letters puts them back into the tray in the first empty slot.
* If you’re stumped, just make words that fit the available guess slots until you figure it out or accidentally get it right.
* The drawing scrolls vertically (up and down).
* You can watch the whole drawing if you don’t guess correctly until your friend is done drawing, guessing correctly stops the drawing and skips to the end.
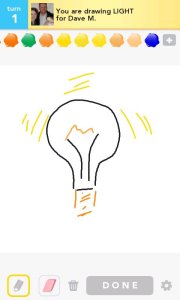
Drawing:* Don’t be too abstract, the point of the game is for your “opponent” to guess correctly.
* If you need more colors, tap the [+] to the right of the color bar.
* The color bar scrolls horizontally (left and right).

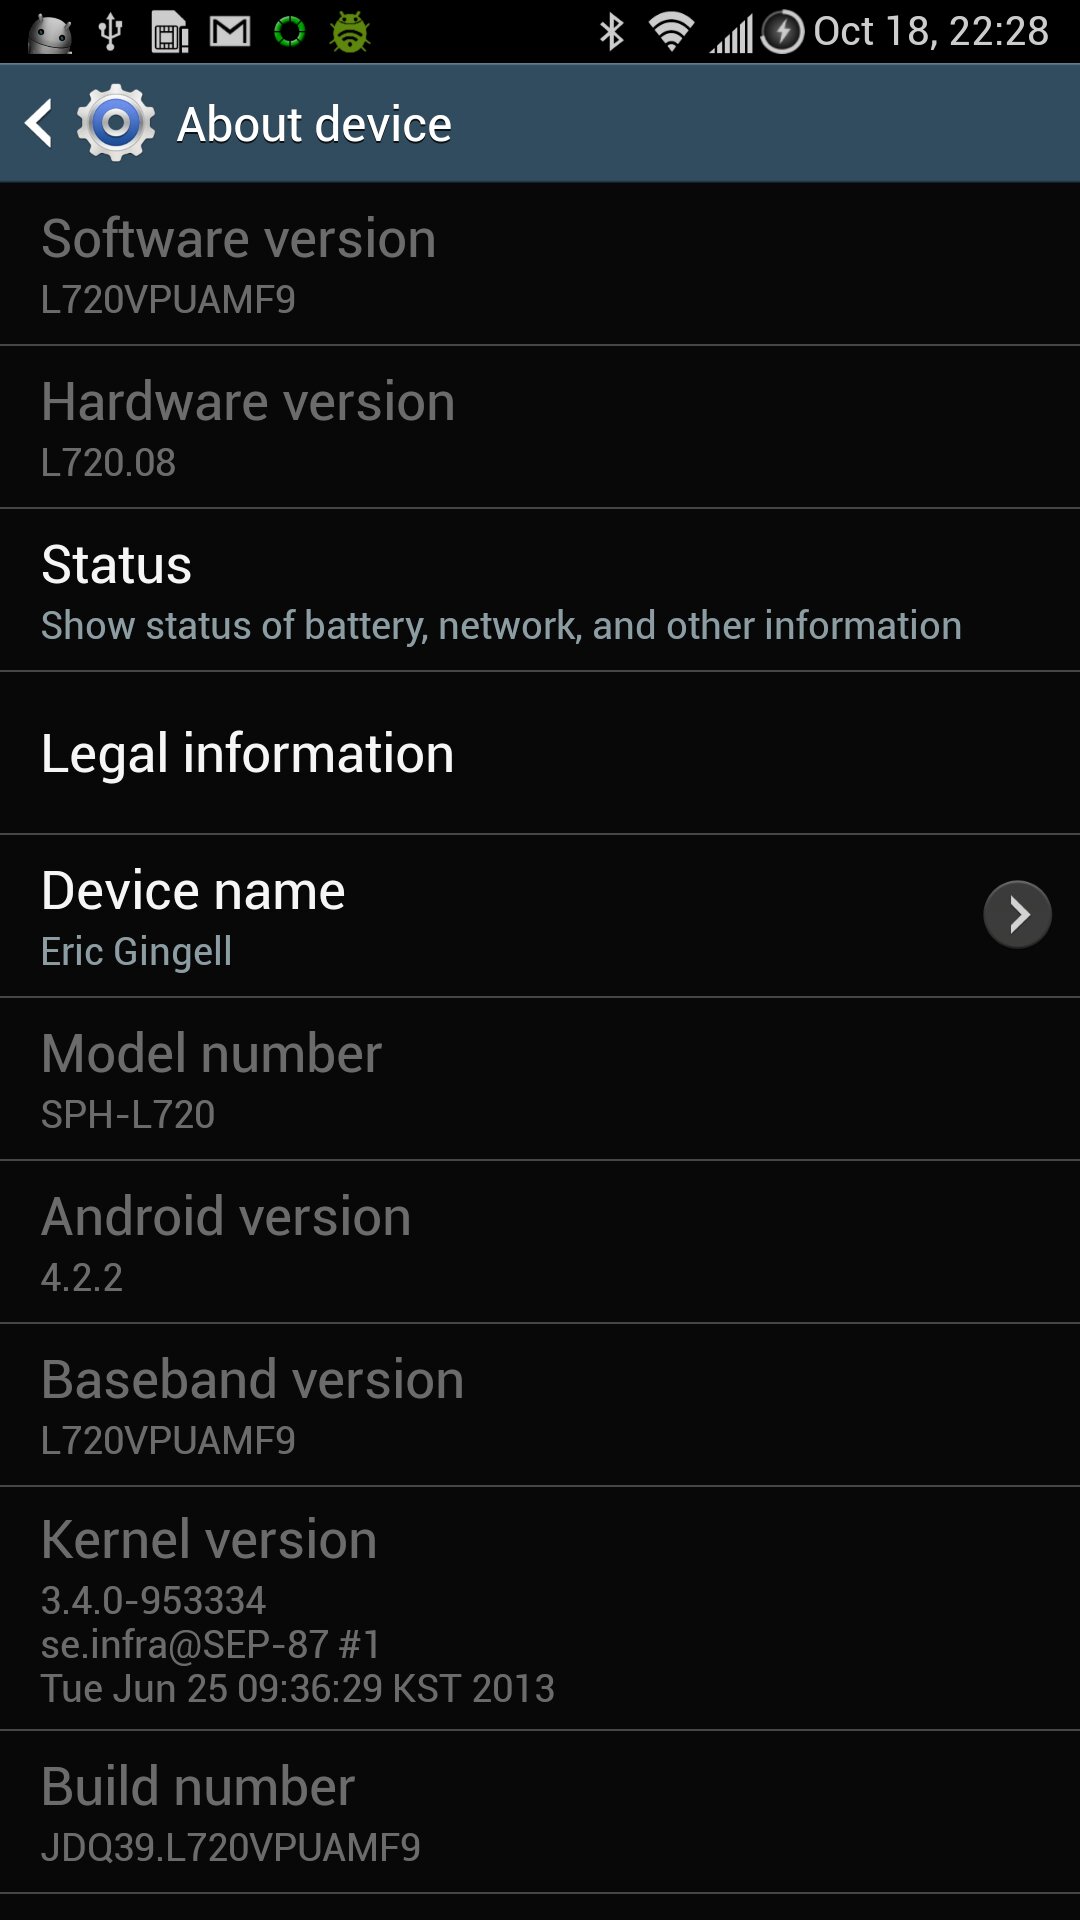
What I’ve done:
- Flashed a rooted stock ROM – JB 4.2.2-MF9 using an Odin One-Click provided by Rwilco12 at XDA.
- Enabled custom boot animations.
- Enabled init.d scripts.
FAQ:
- Q: Are you going to remount the SanDisk to /sdcard and the internal SD card to /data/sdext2 like I did with my S2?
A: Assuming the data partition is still severely gimped, you bet! Just as soon as I figure out how JB 4.2.2 mounts the internal SD card… and I will figure it out.
A: Turns out I don’t need to /data and /sdcard share the same partition. - Q: How did you enable custom boot animations?
A: I replaced /system/bin/bootanimation with one from a custom ROM (Blu Kuban S4) and fixed its user/group (root/shell) and permissions (755). - Q: How did you enable init.d scripts.
A: I added /system/etc/install-recovery.sh that executes the init.d scripts. - Q: How did you get an Android Weather widget on your PIN lock screen?
A: Xposed with the module Samsung Multiple Widgets.